Natural Fabric Dye
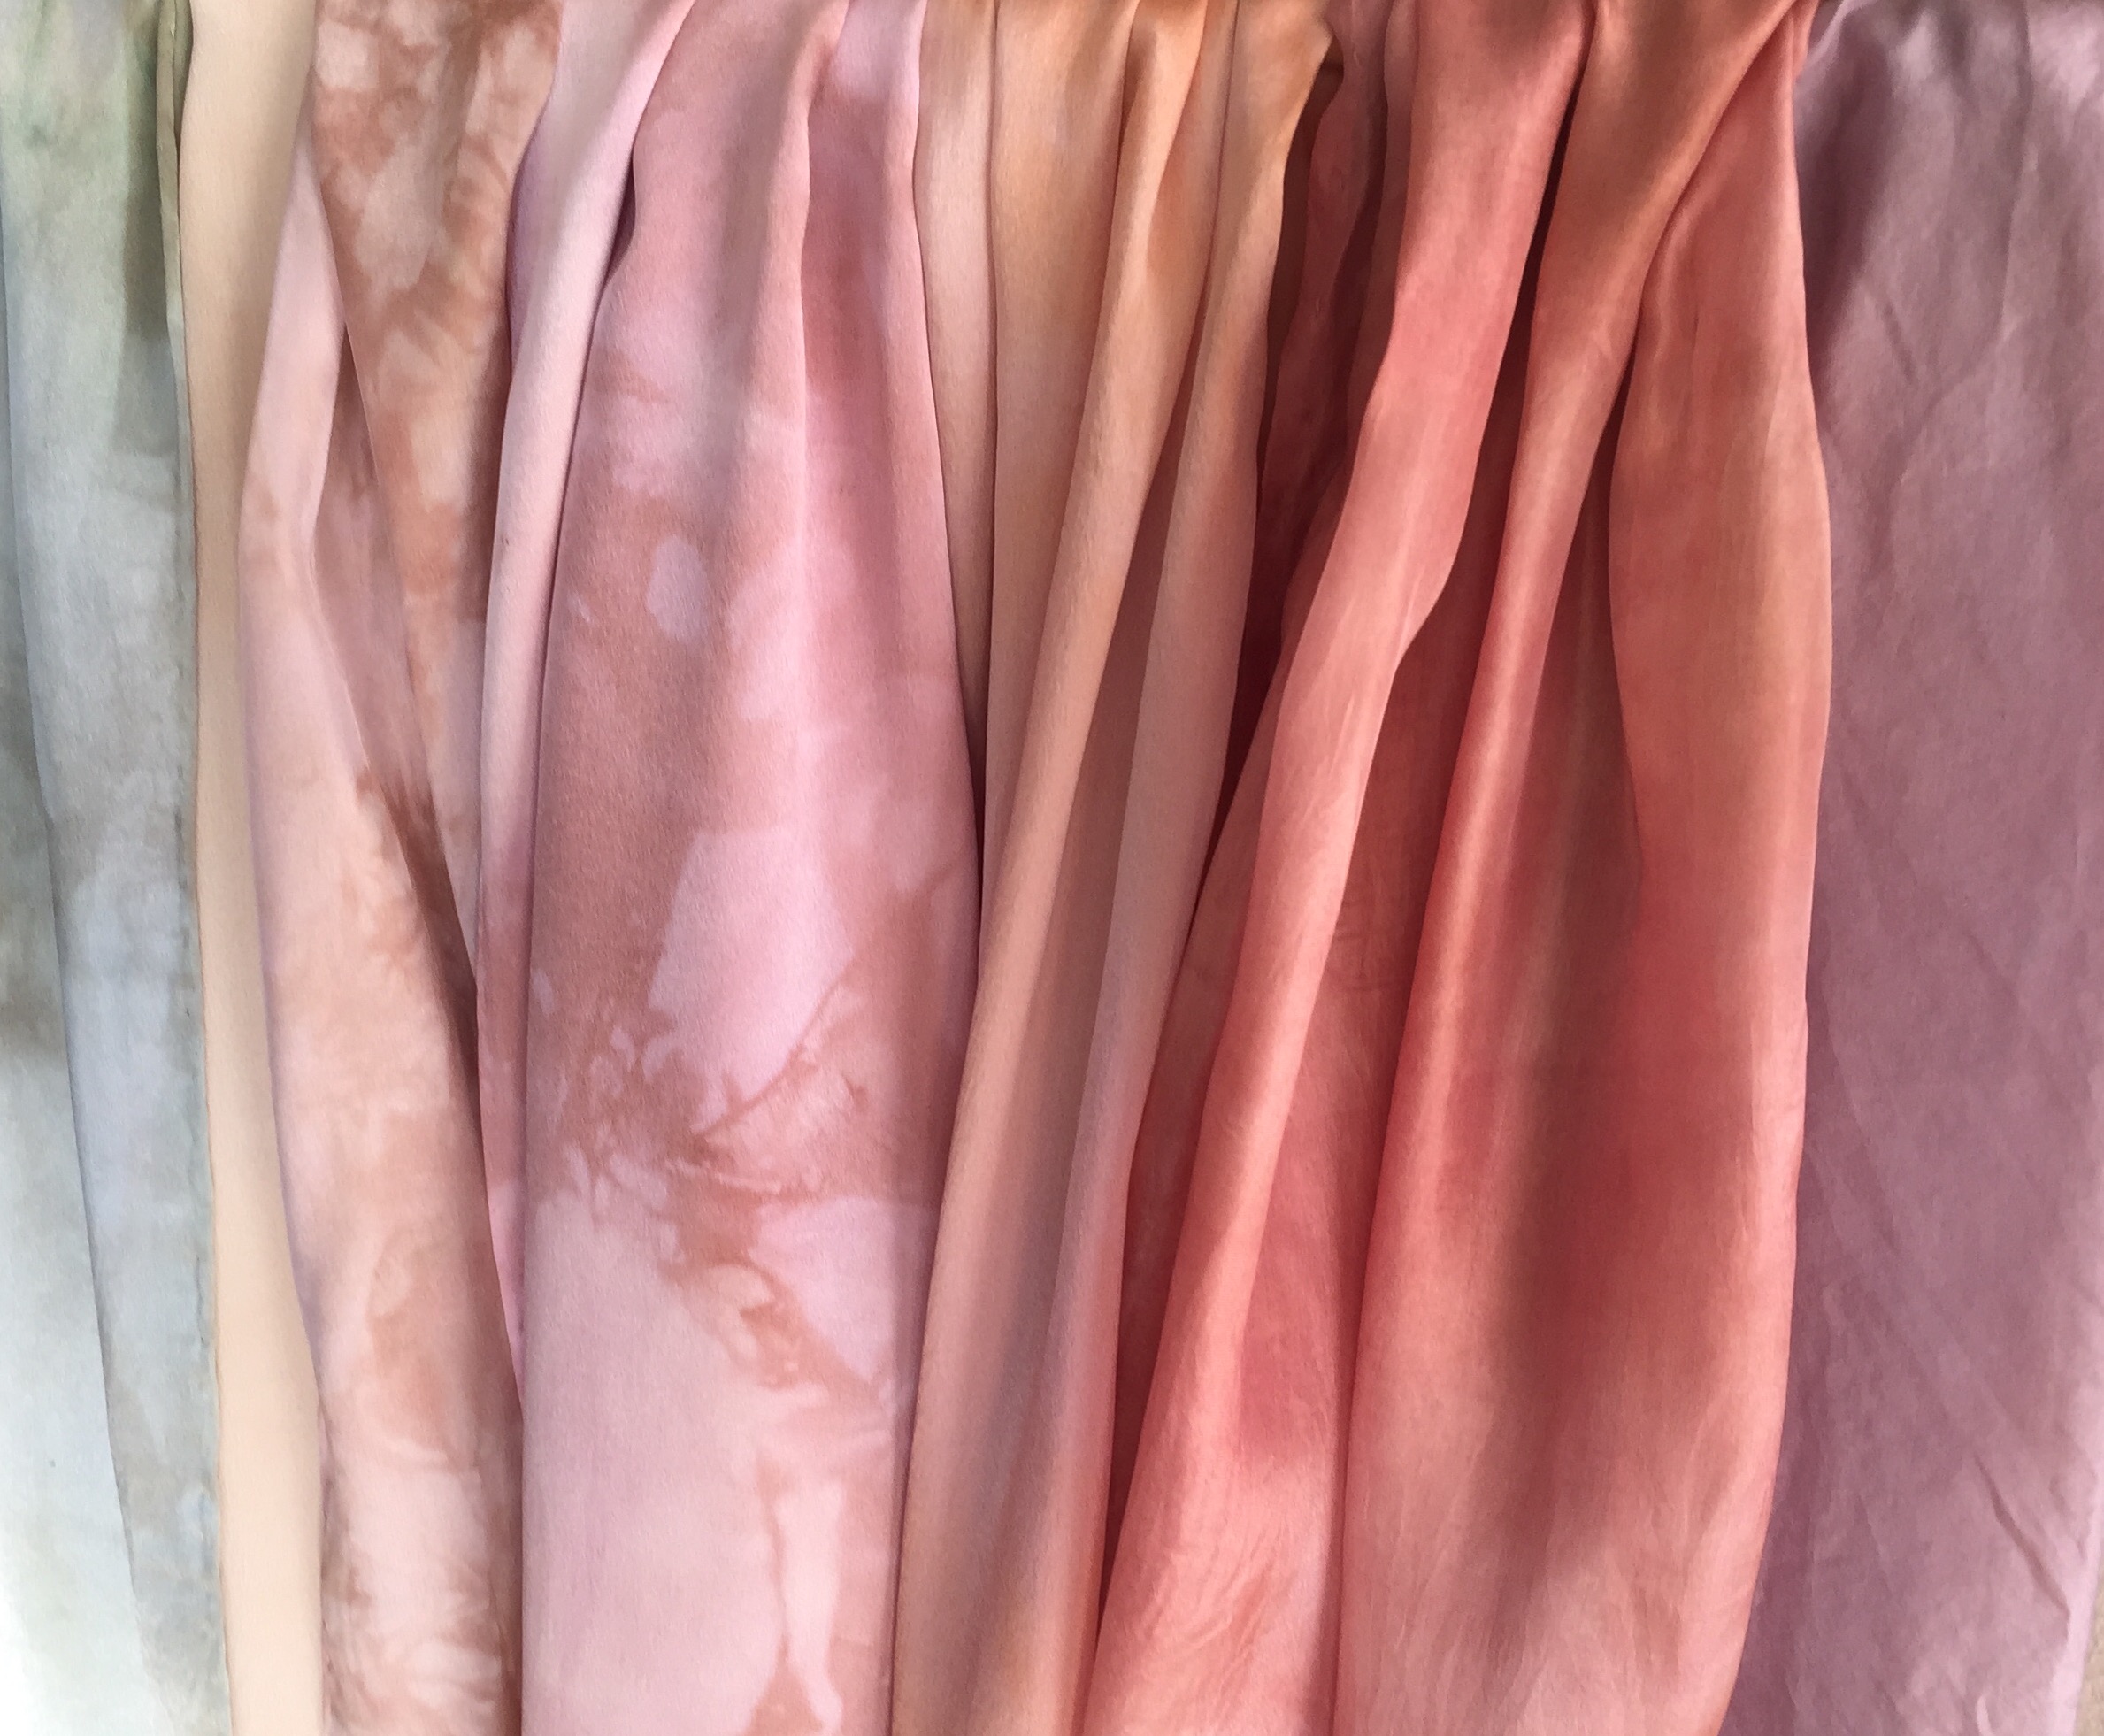 Scarves I've colored with natural dye.
These are my notes about natural dyeing.
1. Overview of process
- Start with clean fabric.
- If it’s not clean, you’ll need to scour it.
- My fabric was all “ready-to-dye”, so I skipped this step.
- Mordant the fiber.
- This treats the fabric so color clings to it more, and stays for longer.
- You’ll need different kinds of mordant for different kinds of fiber.
- I only did silk (protein fiber), so I used alum mordant with cream of tartar (except for when dyeing cochineal, see notes for more details).
- Dye it.
- I did almost exclusively dye bath, occasionally with a “wicking” technique.
- Wash, dry, and iron. (Self explanatory).
Materials
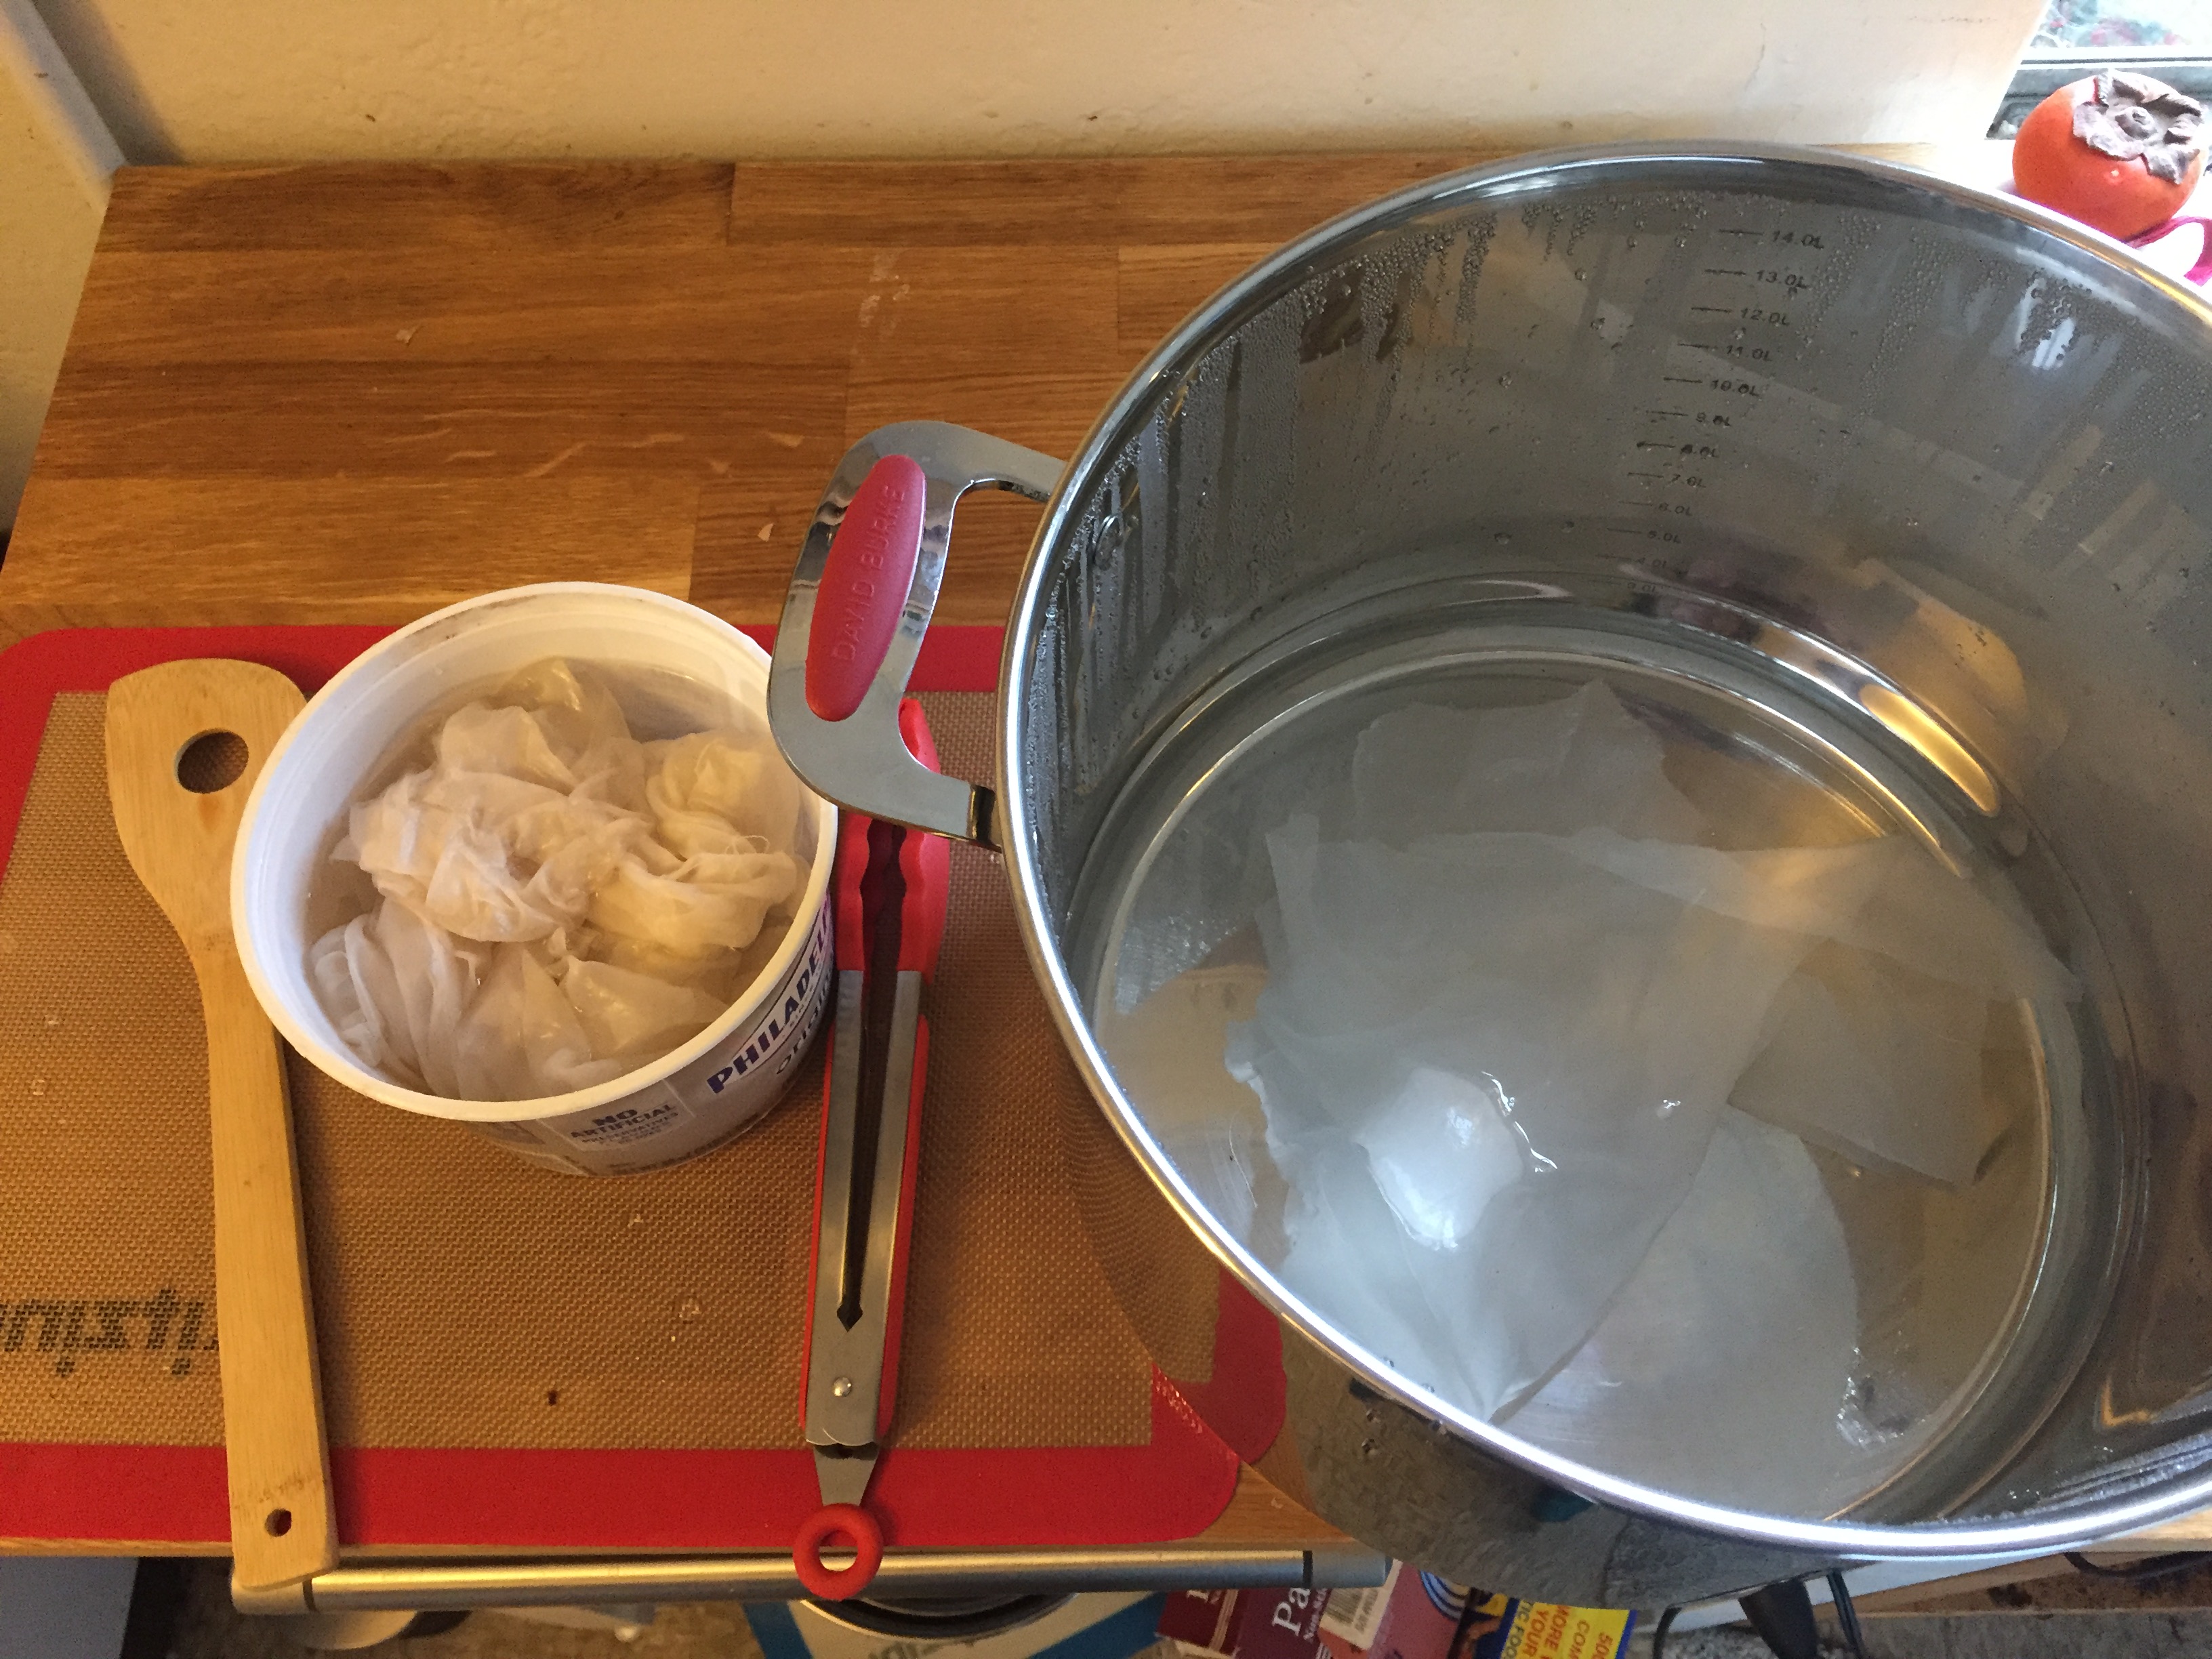 Image 1: pot, manipulator tools, and mat
- Pot for heating things up. I got mine cheap at Marshall’s. (See Image 1)
- Tool for grabbing/manipulating. Cheap tongs from Goodwill, Marshall’s or Ross will work great. I also used bamboo spears for making kabobs. (See Image 1)
- Serious gloves to keep your skin safe.
- A bunch of non-reactive containers. I used mason jars because I eat a lot of pickles that come in mason jars.
2. Terminology, Ingredients and Safety
- WOF: Weight of Fiber. THe weight of the dry fiber, used to calculate how much dye/mordant should be used. source: Maiwa
- Always wear gloves when handling dye-stuff including mordanted fiber.
- Use separate tools for dyeing. Do NOT re-use the same pot you use for cooking. I bought a big one at Marshall’s at an 80% discount.
- Alum and cream of tartar can be disposed of down the sink safely. [18]
- Don’t put the fabric into hot water as it can “shock” it. Put it into cold water instead, and let them heat up together. This is especially true for wool.
- Overheating will cause colors to fade and be ruined. Exact recommended heat levels unclear, and I don’t have a thermometer anyway. I’ll just stay below a boil for safety [28].
- Iron can contaminate a pot even through different dye-baths, so probably best to keep it in its own special dyebath [28].
- To raise pH (make more alkaline), you can add soda ash (can produce chemical burns so wear gloves). You can make your own soda ash [30].
- Heat water bath up to 80 degrees C / 180 F and then keep at that temperature for 45 minutes [13].
3. Scouring
Silk
I tried a few test stripes using clarifying shampoo. Since it is meant to not deposit anything into my hair (protein fiber), I thought it would be suitable for not depositing into the fabric as well. There was no difference between the test strips that had were scoured and those that weren’t, so I stopped doing this. Here are my notes anyway.
Scour the fabric to remove oils, chemicals, or anything that could cause a barrier between the fiber and the dye. For cellulose fibers (cotton, etc), synthrapol is common. For protein fibers (silk, wool), orvus soap paste is used. [[1, 2]]
Orvus paste is typically 100% sodium lauryl sulfate (sheep shampoo), with no surfectants or other ingredients [3]. Other detergents like common dish soaps contain sodium lauryl sulfate, but they also have silicones and other ingredients, which can coat fibers and prevent dye from adhering.
Cotton
Necessary to use soda ash to scour cotton properly. Boil for ~2 hours, stirring frequently. If scouring water is brown or grey, repeat 35. Maiwa recommends also using synthrapol 16.
4. Mordant
Soak the fabric in appropriate solution of mordant at least overnight. No need to rinse. There are many different ways to mordant a fabric. Below are some options I researched.
4.1 Alum – Potassium aluminum sulfate
The mordant most frequently used by dyers for protein (animal) and cellulose (plant) fibres and fabrics. It improves light and washfastness of all natural dyes and keeps colours clear. It is inexpensive and safe to use. Alum is refined from bauxite, the raw state of aluminum ore, and is free from the impurities (such as iron) some other alums can contain [4].
Use at 12-20% WOF. Mordant once with alum at 15% WOF and then again with a fresh mordant bath of alum at 15% WOF. A tannin/alum/alum mordant achieves slightly richer colours [4].
Cream of tartar also increases the uptake of alum into the fabric, and “brightens” the colors [11].
4.2 Iron
Add iron to two parts water, one part vinegar in a jar [10]. It’s ready when it becomes the color of light tea. This “saddens” dyes, and can bring out darks better. It can make protein fibers stiff or brittle [17]. Some people do an iron dip in combination w/ caustic soda (very high pH, or very basic). I’m not sure why half the people use acid and half use basics. Notjustnat doesn’t share her process, but gets great results from eucalyptus and rusty tin cans [21].
4.3 Copper
Copper wire in one part water, one part vinegar. Ready to use when blue [10]. Details on safe copper mordants. Often used w/ blues or browns, tin is preferred for red for some reason. Copper in vinegar can be toxic. Instructions say to “safely dispose of” but I don’t know what that means [34].
4.4 Mordant Process
Use enough water that the fabric can move freely. Approx. 3 litres (6 pints) of water to 100 gr of fabric [11]. Slowly bring to a boil, and simmer for ~45 minutes.
From Maiwa [15]:
- Weigh the fibre dry, then scour.
- Measure alum at 15% WOF
- Measure cream of tartar at 6% WOF (optional, see cream of tartar, mordants part 1).
- Dissolve both the alum and the cream of tartar in very hot water in a non-reactive container.
- Add the dissolved chemicals to the dye kettle with enough warm water 45º C (110º F) to cover the fibre when it is added - usually a 30:1 ratio of water to fibre. Stir well.
- Add the scoured, wet fibre. Over 30-45 minutes bring the temperature up to 90º C (195ºF) Just under simmer for wool, and 85ºC (185ºF) for silk. Hold for one hour, gently turning the fibre regularly.
- Let cool in the bath for 20 minutes.
- Remove the fibre from the mordant bath. Allow to hang evenly over a non-reactive rod (stainless steel, plastic) until it stops dripping. Rotate the yarn or fabric frequently so the alum is evenly distributed.
- Store the yarn or cloth in a damp white cloth for 24-48 hours. Keep it damp during this entire period if proceeding to dyeing. If you are going to store the fibre longer, then it needs to dry completely and then be stored in a dark place.
4.5 Mordanting Cotton
You can mordant cotton with alum in a 3-step process that also includes soda ash and a tannic acid 36. Salt and vinegar may also be used as fixatives 37. Be sure to neutralize before dyeing, to make sure you don’t mess up your dye bath 38. Maiwa recommends a 2-step process w/ tannin first and alum second. For cochineal dyeing, Maiwa recommends: tannin at 8% WOF and then alum at 15%, or alum acetate at 8%. 16.
5. Dyes
- Eucalyptus leaves/bark dipped in vinegar and then tightly bound to fabric can make a deep red pattern [6]. Different leaves give many different colors, in many different situations. Leaves dried on the ground are different from fresh, for example, as are all different species [7]. I believe the ones I have near me in the hills of Berkeley are “Blue Gum Eucalyptus” (Eucalyptus globulus) [8]. Eucalyptus globulus can make grey, possibly only when combined w/ cellulose fibers and soy milk mordant. I may combine my alum-mordanted protein fiber w/ some iron mordant in the dyebath to see what it does.
- Avocado skin and seed make pink. Skins will tend to give colors that are redder whilst pits give oranges and apricots [14]. Five or six large avocados for 100 grams of wool will give a lovely light-to-medium pink shade. You will need many more for deeper colors. Rebecca has some pics of avocado stone dying [24]. She also steams w/ avocado skins on soy-mordanted cotton [25]. Others raise the pH (by adding soda ash) to make it more basic, and only use the nuts. This makes the color MUCH darker/deeper and more pink [29, 32]. For some, doing a soda ash mordant results in pink, but adding soda ash to the dye bath makes it a more red-orange [32]. Both skin and seeds can be stored in the freezer [27]
- Red onion skins Make pink w/ highly acidic wash on cellulose according to Rebecca [22]. Depends on fabric of course [23]. Other notes indicate that protein fibers may go brown in red onion skins [22].
- Tea makes a brown probably. Mint tea can make bright yellow.
- Turmeric makes brilliant yellow but will likely fade (it’s “fugitive”).
- Coffee can make brown. Simmer coffee grounds in a pot for ~1 hour, then pour water out, save it, and simmer fresh water in the same grounds again for another hour to get more color. Soak the fabric in the strained coffee water for at least 24 hours.
- Cochineal - fuschia (unless w/ cream of tartar in mordant, which will make it “true red”). Iron at 2-4% WOF pushes it towards purple. You will need only 3-8% WOF for a medium depth of shade. The cochineal rich red can be shifted to orange with the addition of an acid (vinegar) and to a deep fuschia with the addition of an alkaline (soda ash). See PDF for prep instructions [16]. Very dense, so only 20% WOF needed [31]. Acid pushes towards orange, base pushes towards purple. Might be able to play w this with vinegar and soda ash. Extensive details here [34].
- Black beans make a beautiful blue w/ copper-mordanted protein fiber [9]. Soak dry beans in water for 24 hours [9]. Most people remove the beans, but I left them in. Going for more than 24 hours will start the fermentation process which smells bad and the color isn’t as bright.
- Rusty water not much info about this, but apparently it’s possible [26].
- Iron water The solution was 5g ferrous sulphate to 500 ml of water [32].
5.1 Dye process
- For an immersion dye bath, just leave the materials in the dye bath for as long as possible. I usually did around a week, but had good luck even with only a few days. I got AMAZING colors and patterns from stuffing a glass mason jar with fabric, pouring dye over it, and leaving it in the sun for a week. For some reason this resulted in swirly, subtle patterns.
- For “wicking”, I would leave the lid open and pile half of the freshly-mordanted fabric in the jar, and half in a plastic cup outside. You can vary the height of the plastic cup for more or less wicking (higher is less, lower is more). Also be sure the fabric is all wet, even if you don’t want it all to wick or you’ll get bizarre water lines.
Process Overview
To give you an overall idea of the process and outcomes, let’s walk through a complete example from start to finish.
1. Mordant the silk in a pot. After weighing the fabric, I dissolved the appropriate amount of alum into a pot with enough water that the fabric could float freely. Then I added the silk, and heated everything up to “steamy and hot but not boiling” for ~45 minutes a couple of times a day for ~24 hours:
Image 1: pot, manipulator tools, and mat
After it’s heated for a while, I leave it in a plastic container, soaking in the mordant until I’m ready to dye it. This is also because I only own one “dye-safe” pot and don’t really have room to store multiple pots that aren’t used for cooking.
2. Prepare the dye stuff. For this example, I’ll talk about how I prepare onion skins. Each dye has its own way of being prepared, this is just to give an idea of the overall process. I gathered ~64 grams (a grocery bag-ful) of onion skins at the grocery store by grabbing the loose skins out of the onion section. I just asked in advance and they were fine with it. To get so many, I actually visited three different grocery stores.
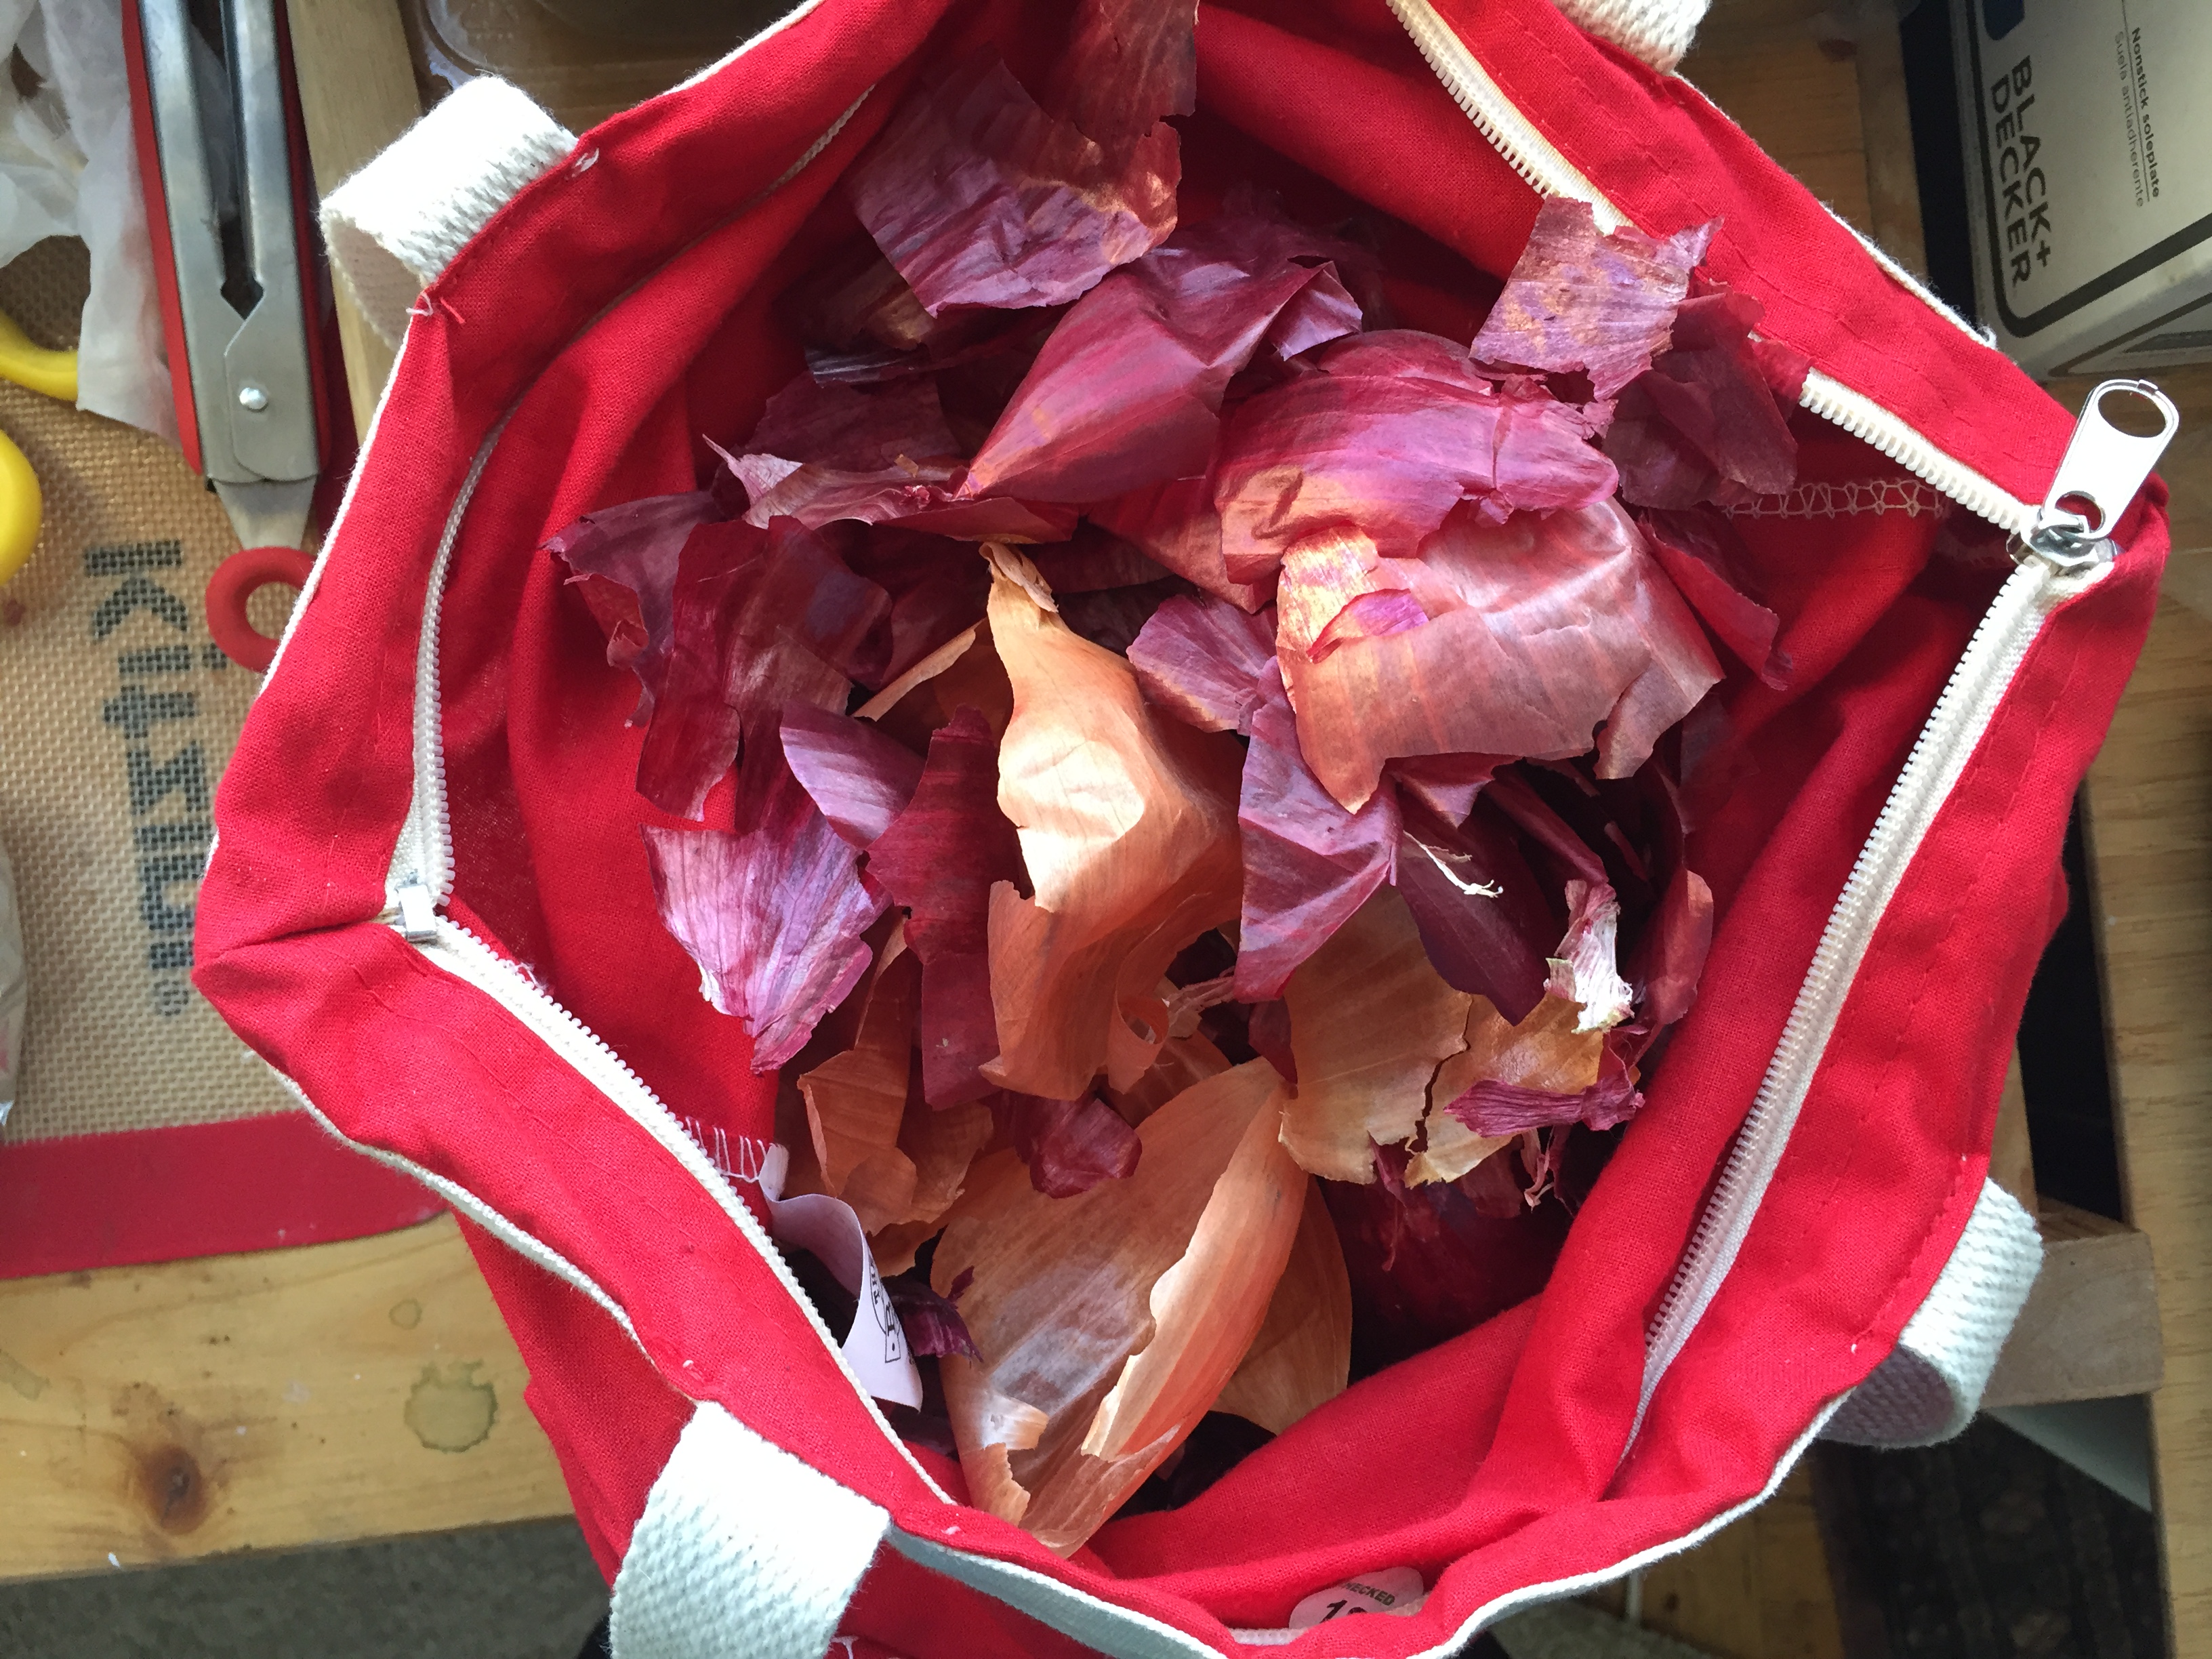 Onion skins from the onion bin at 3 grocery stores.
I then put ~34 grams into a glass mason jar, and filled it completely with water. Then I left it to soak in bright, direct sunlight for ~24 hours, rotating occasionally.
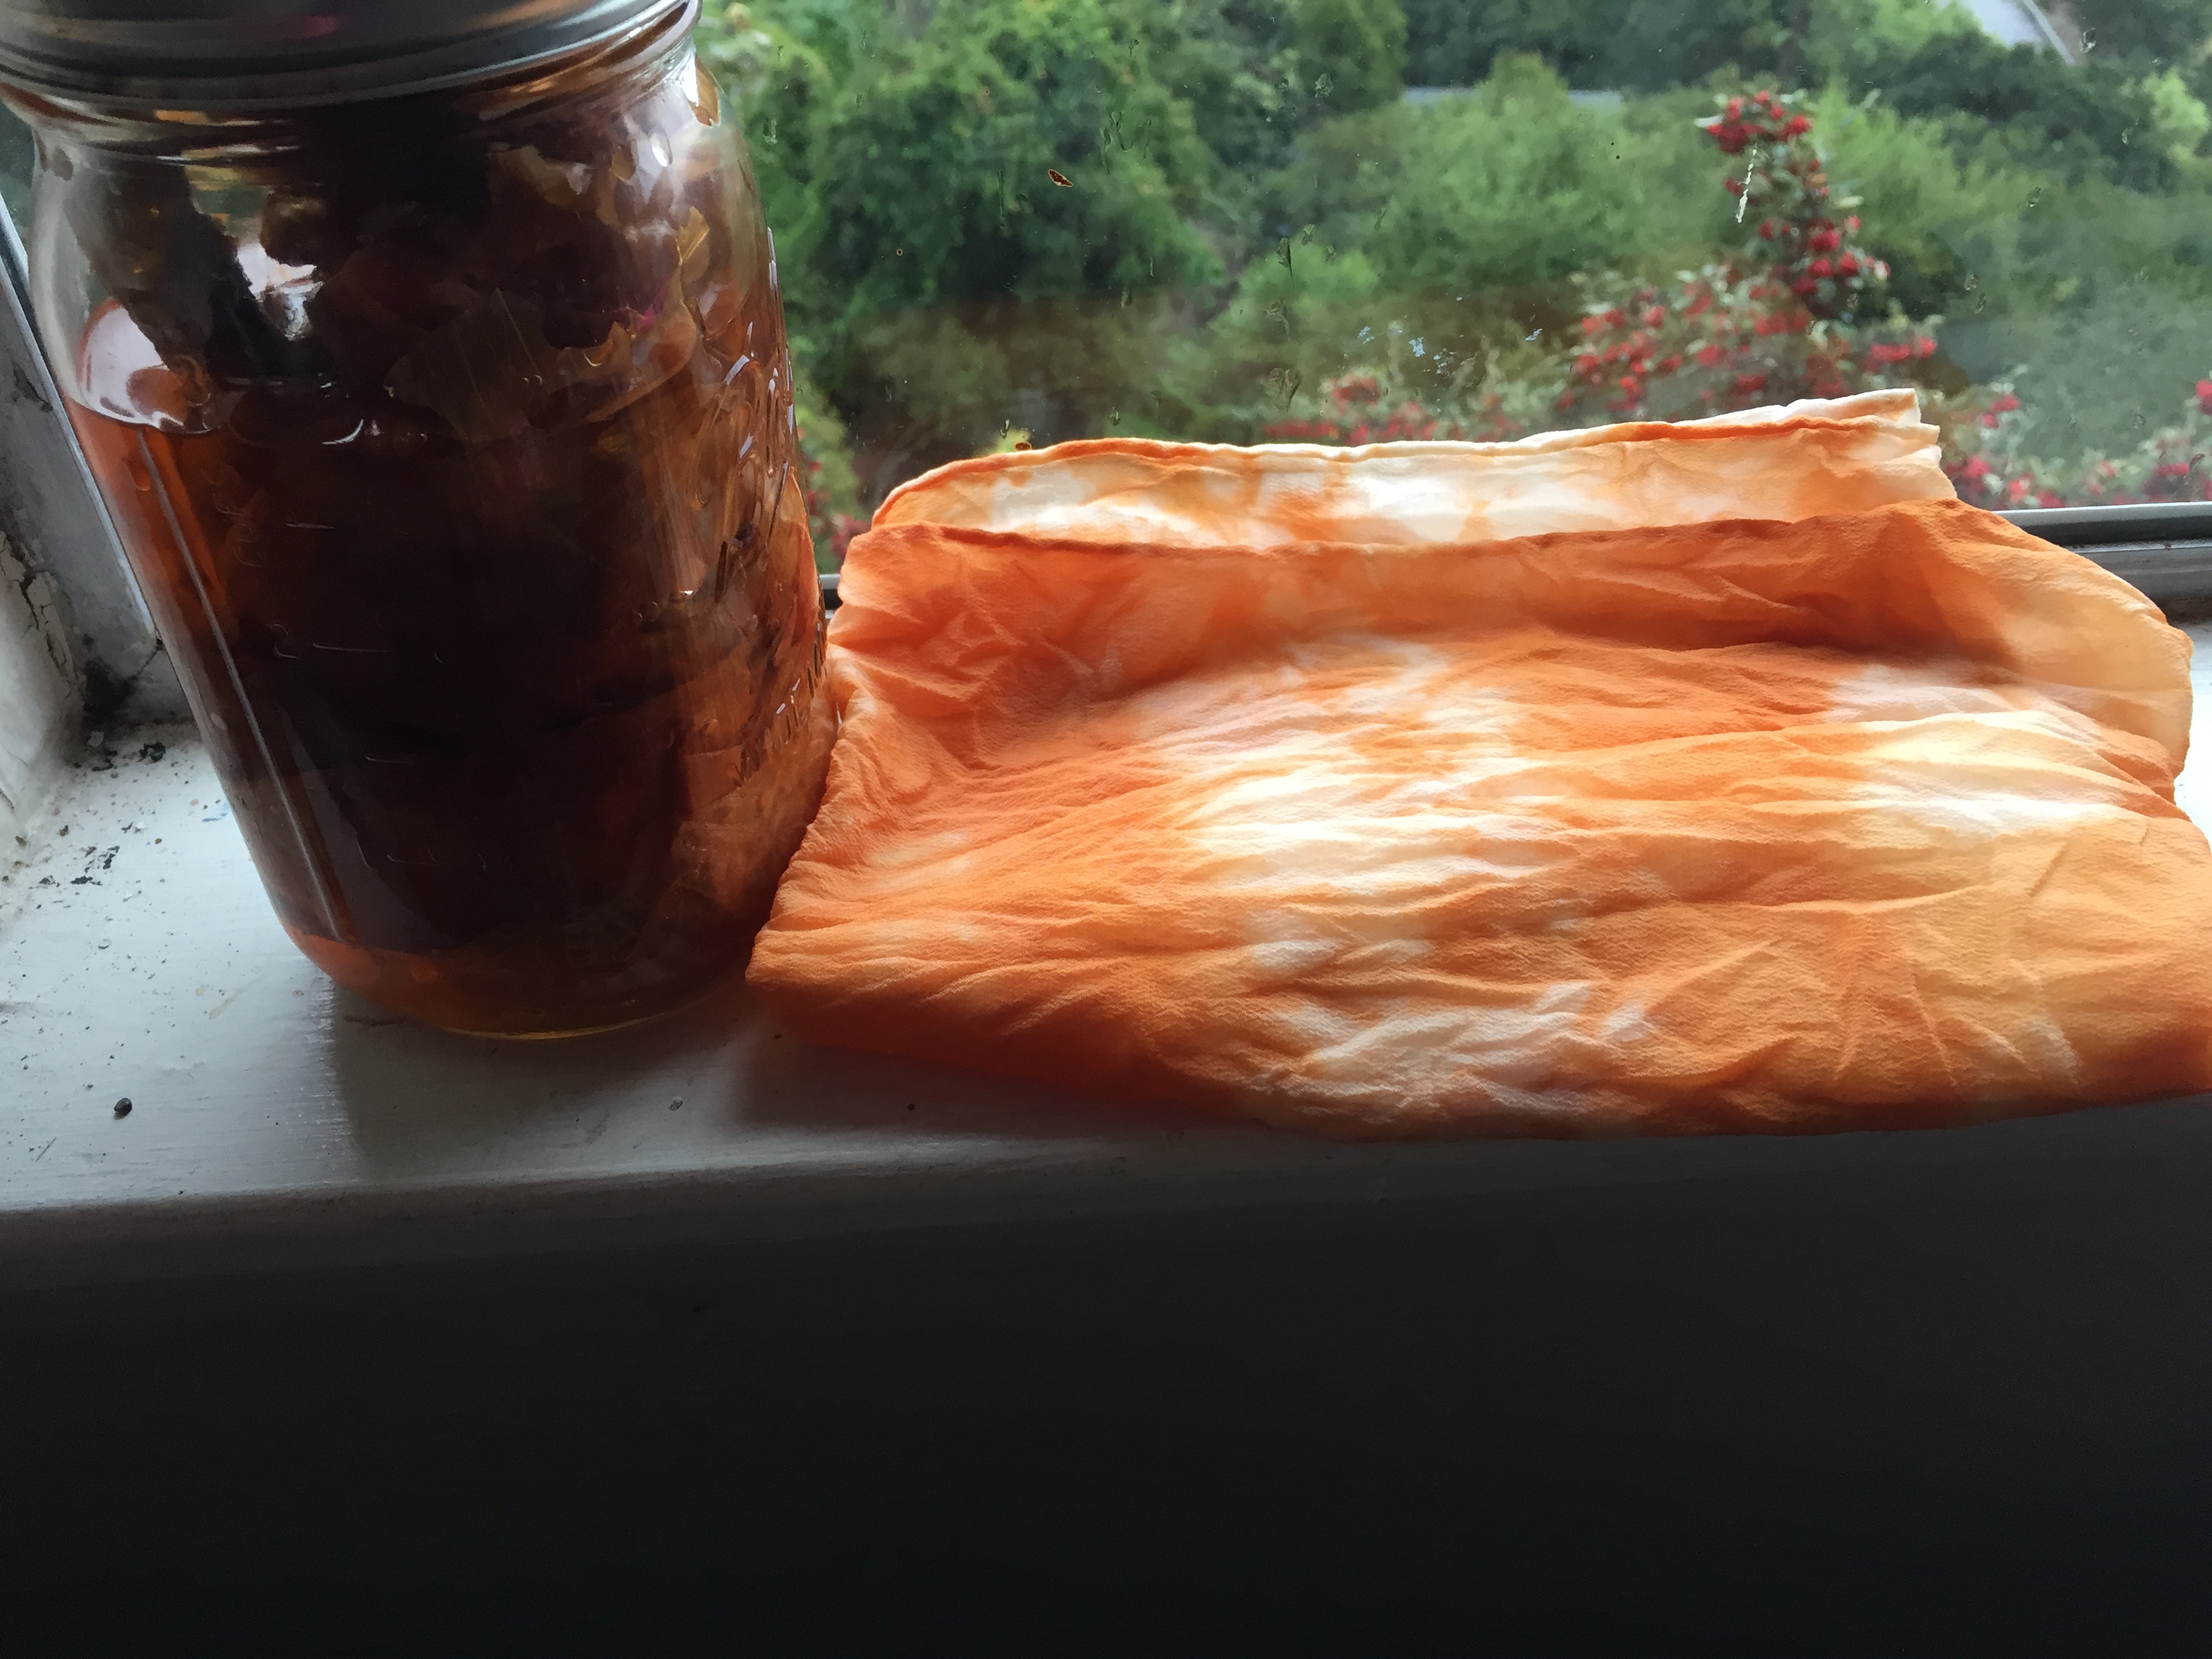
3. Add the silk. Sometimes I stuffed the silk into the jar directly:
 Silk soaking in yellow and red onion skins.
…Which resulted in AMAZING textures and patterns:
 Patterns and textures from stuffing a silk scarf into a mason jar as it dies in the sun.
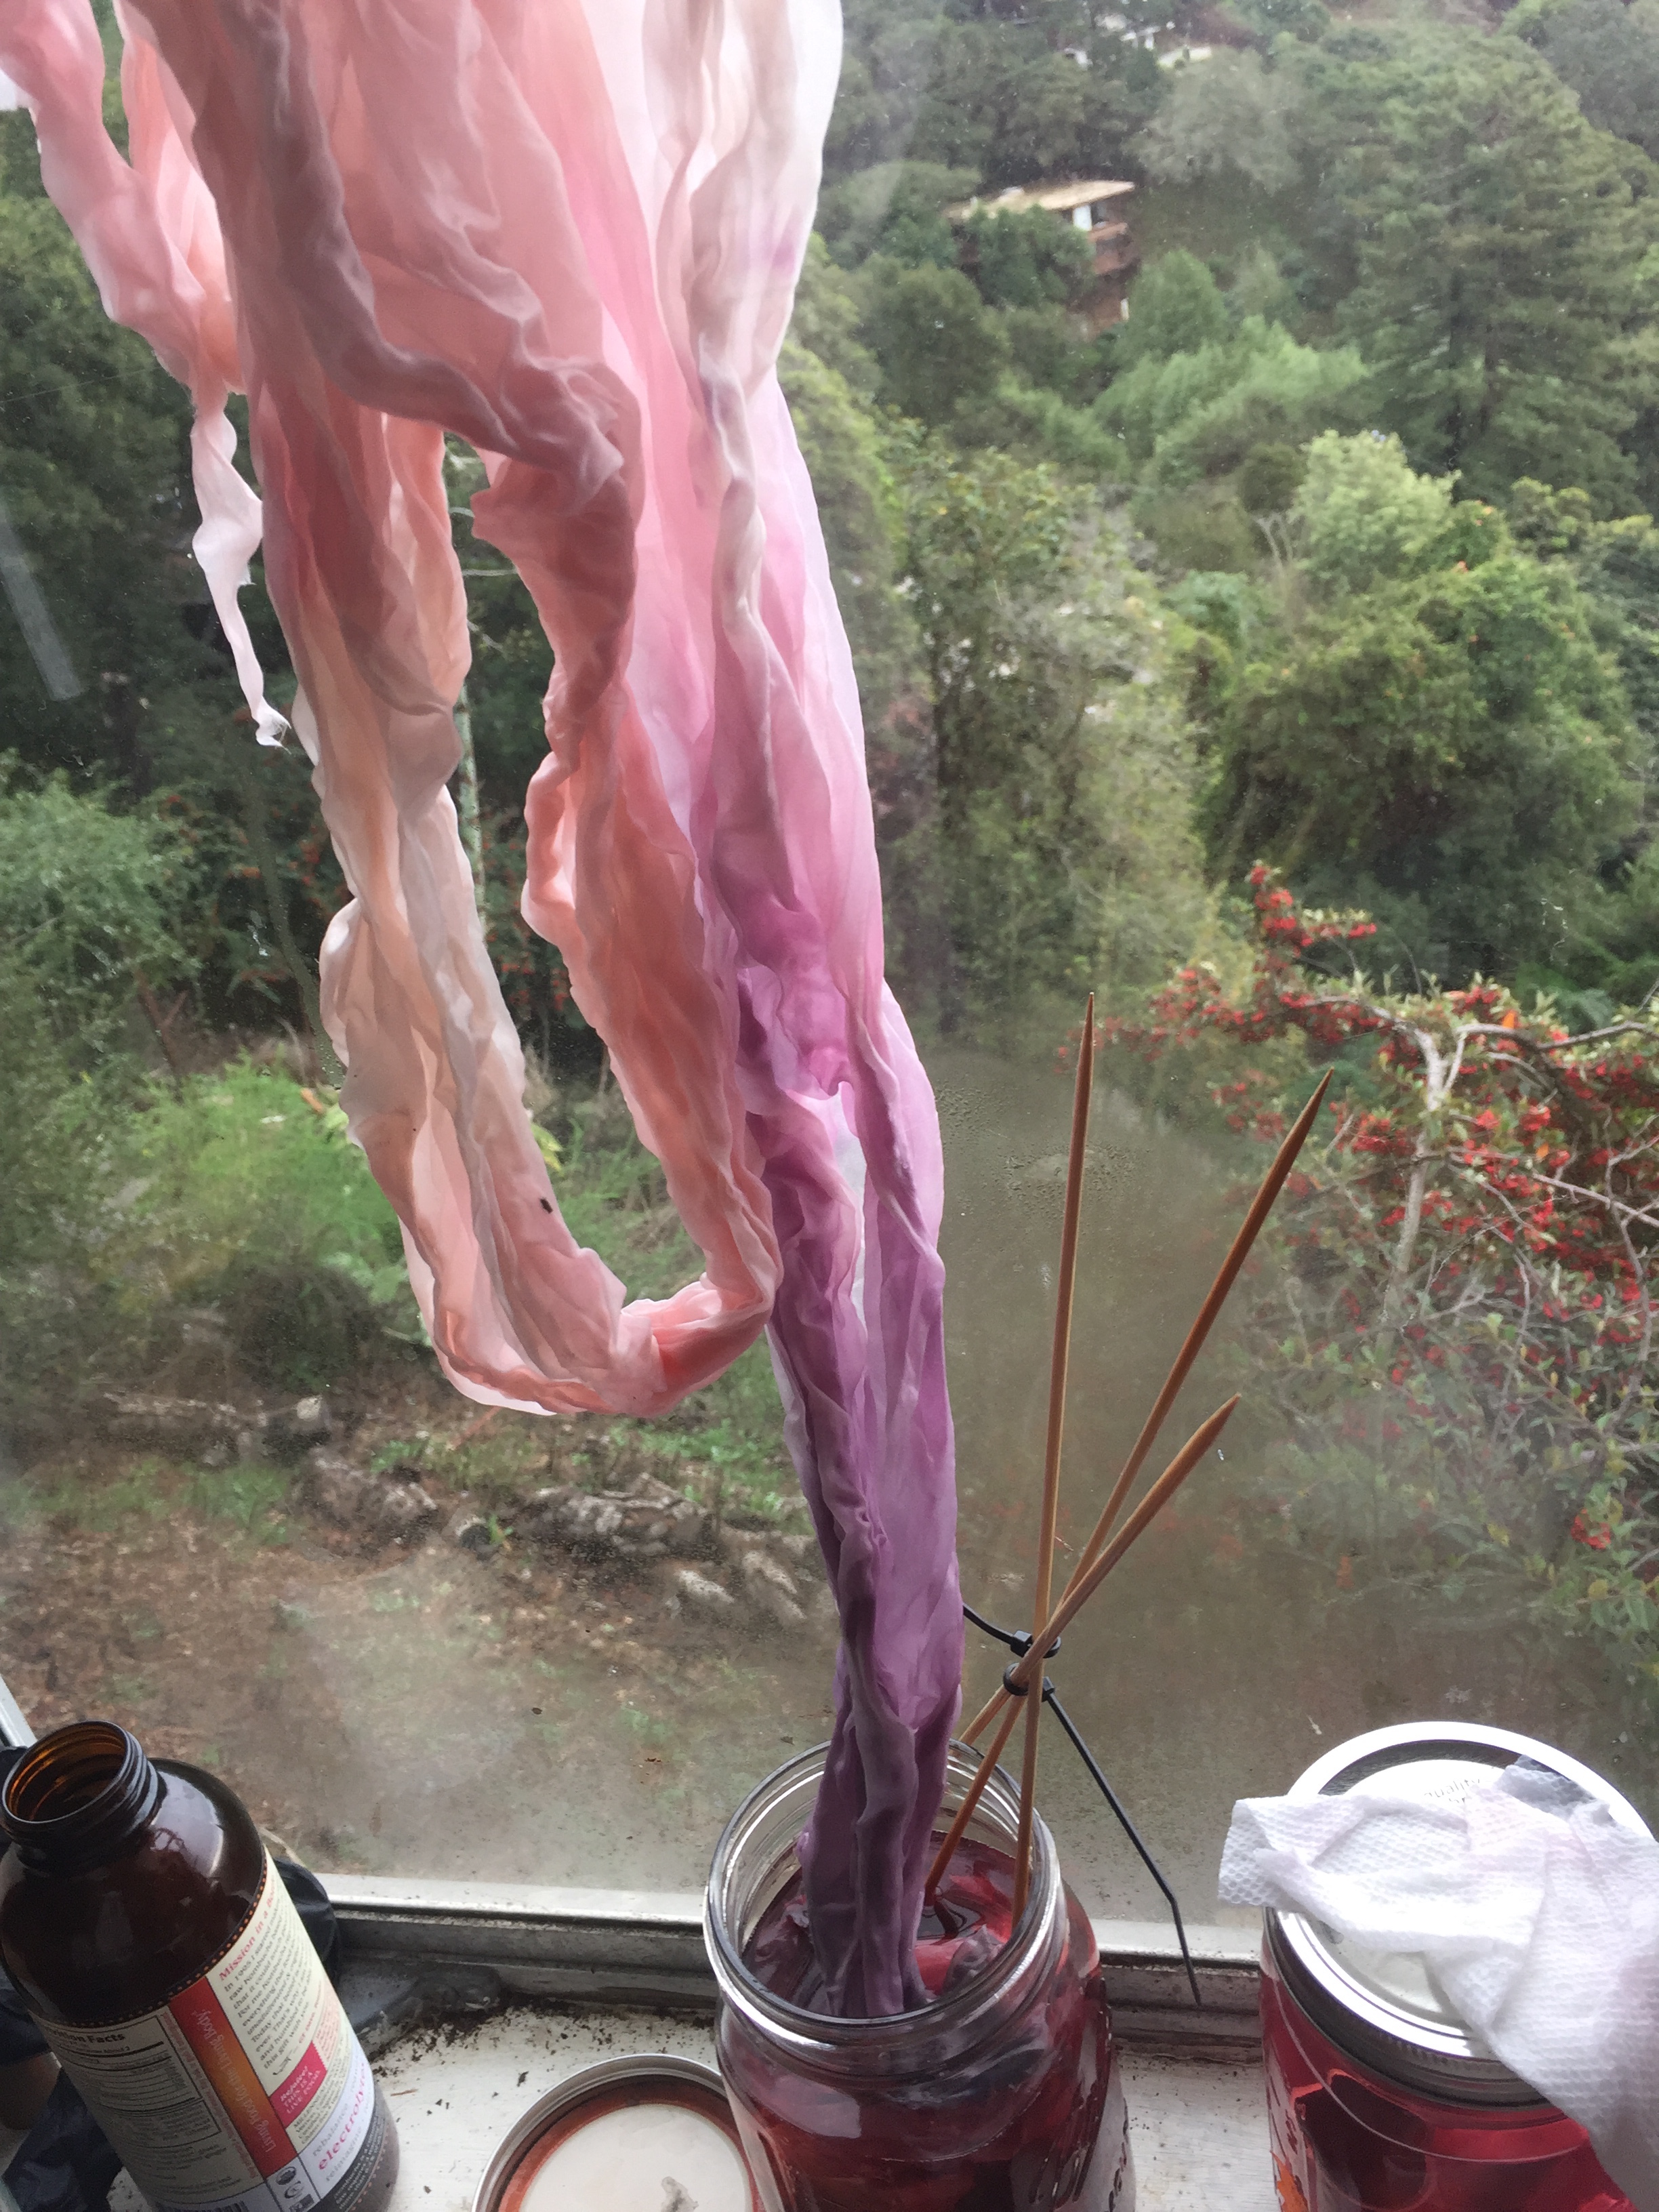
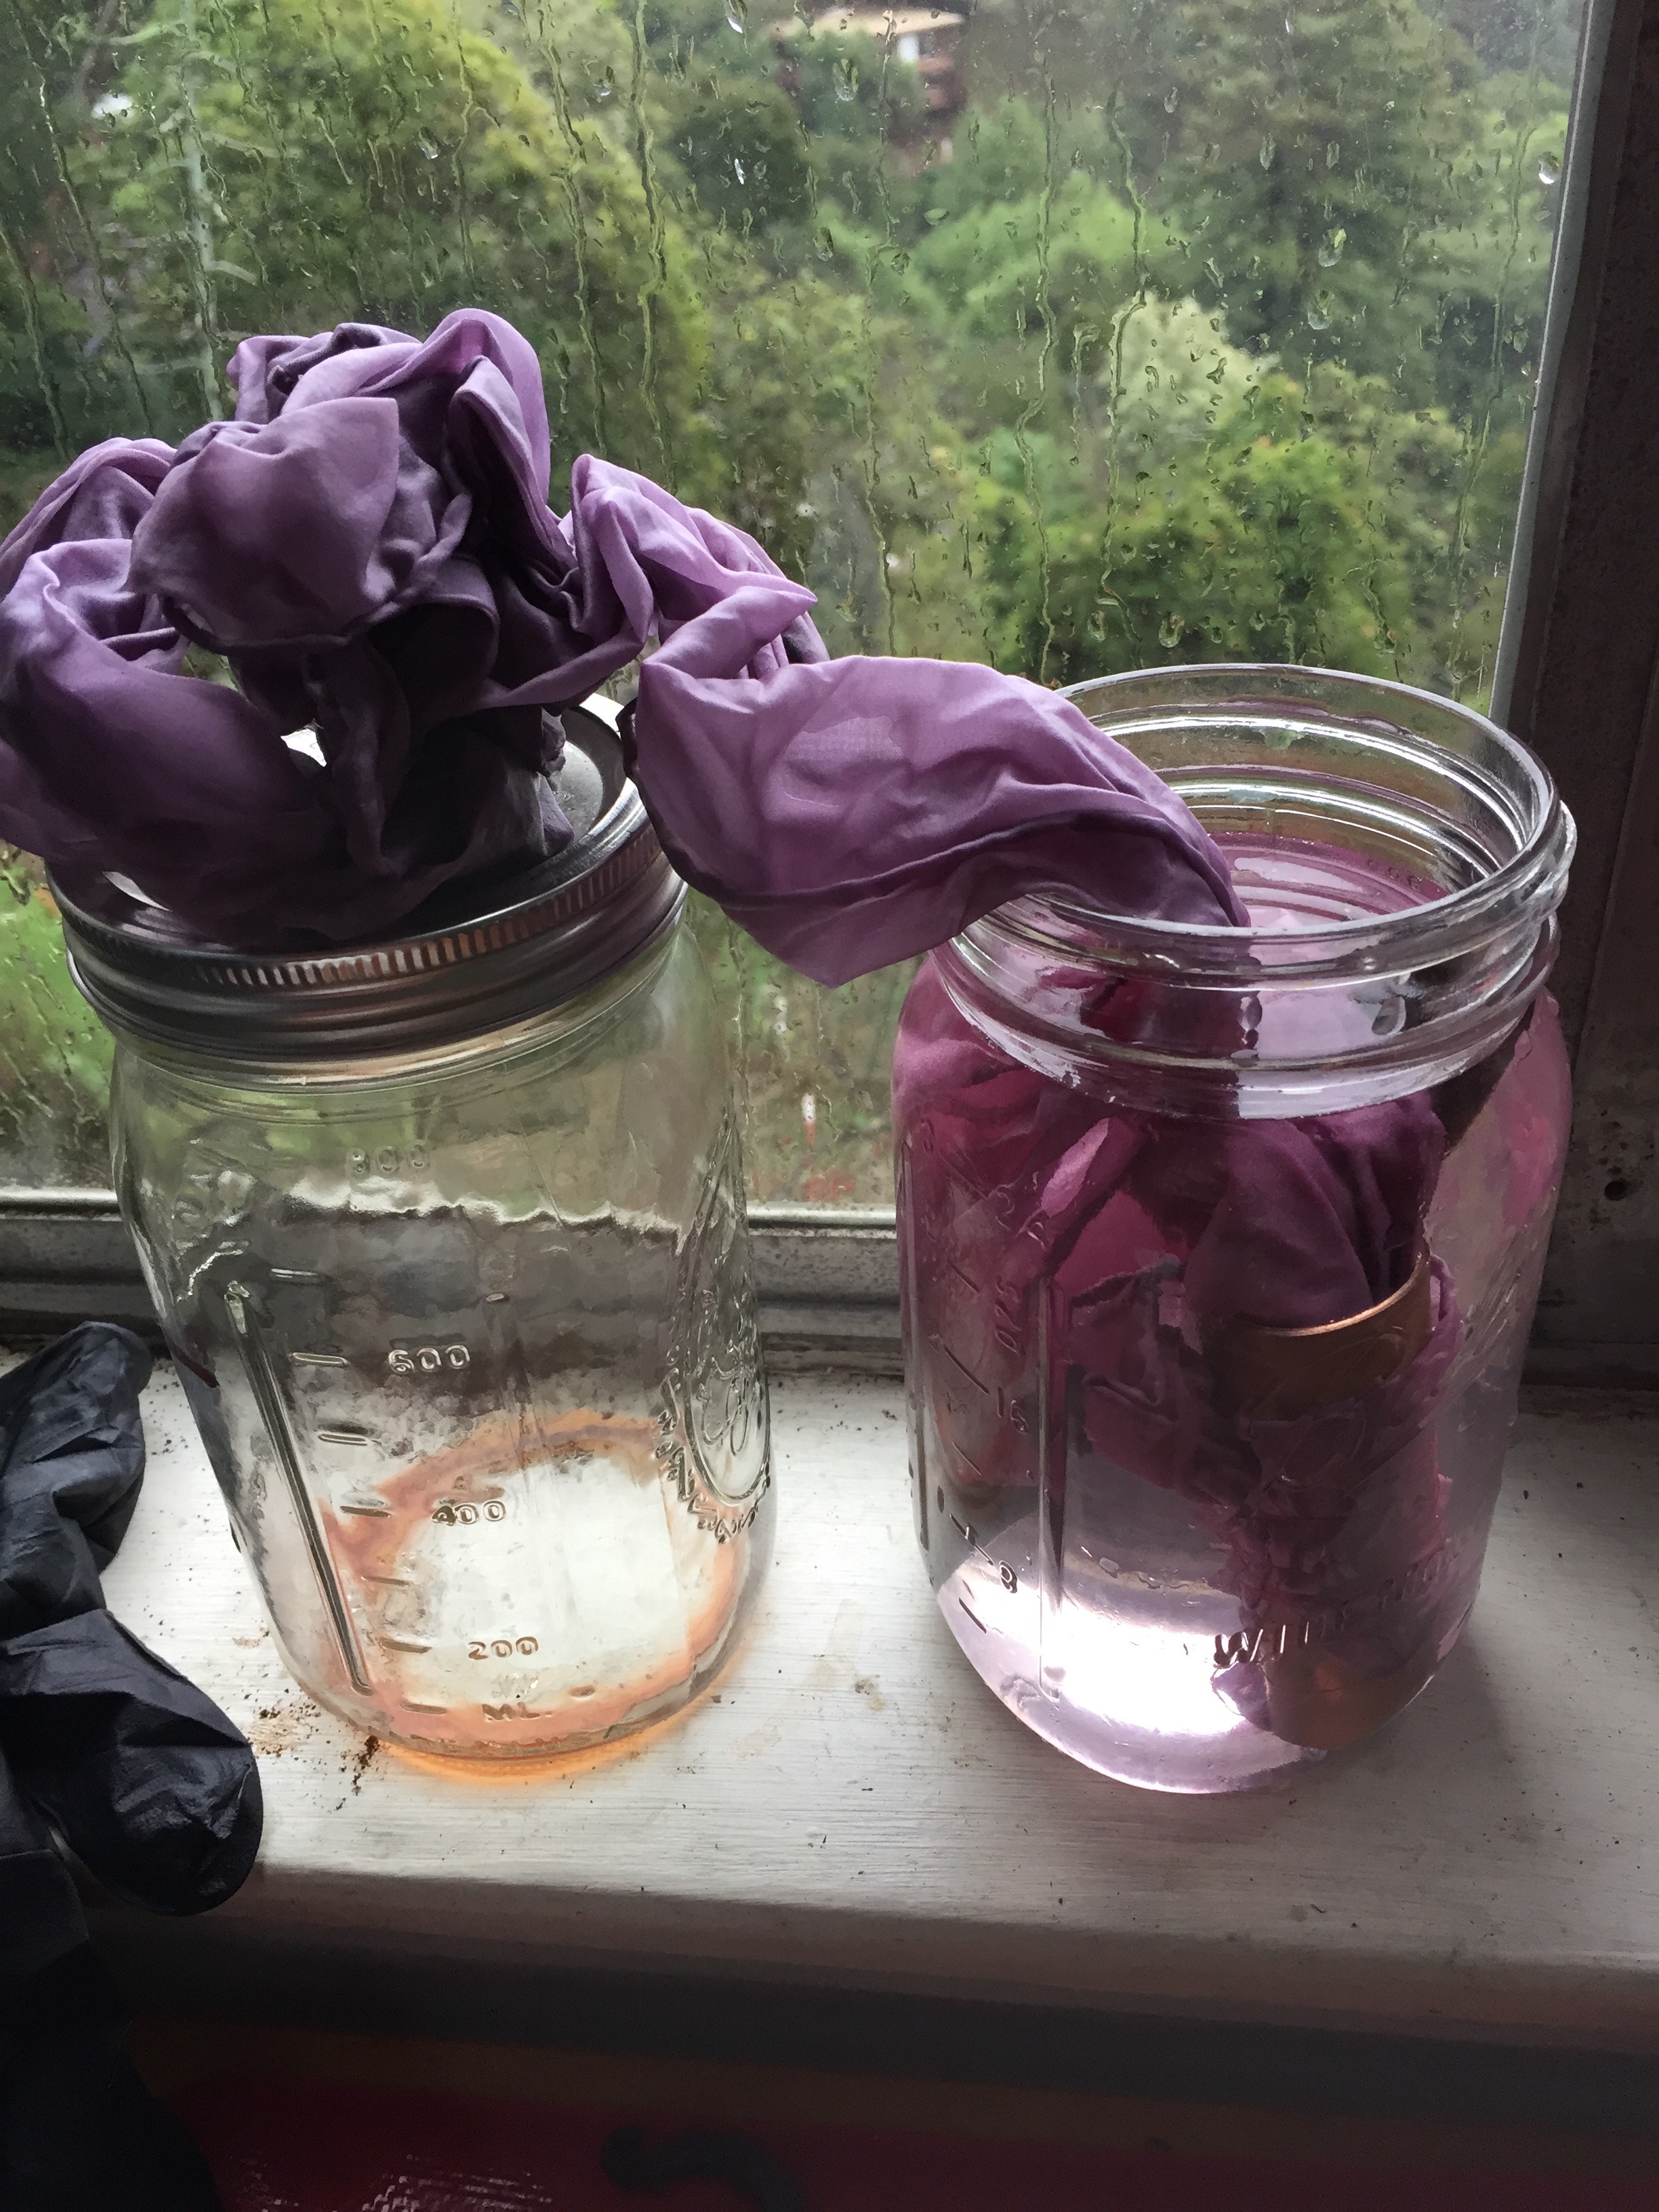
Sometimes I left some of the silk hanging out to “wick” the color up, fading as it goes. Note that the lid of these mason jars can act as an “iron mordant”, which changes the dye colors (that’s where the dark purple comes from in example below):
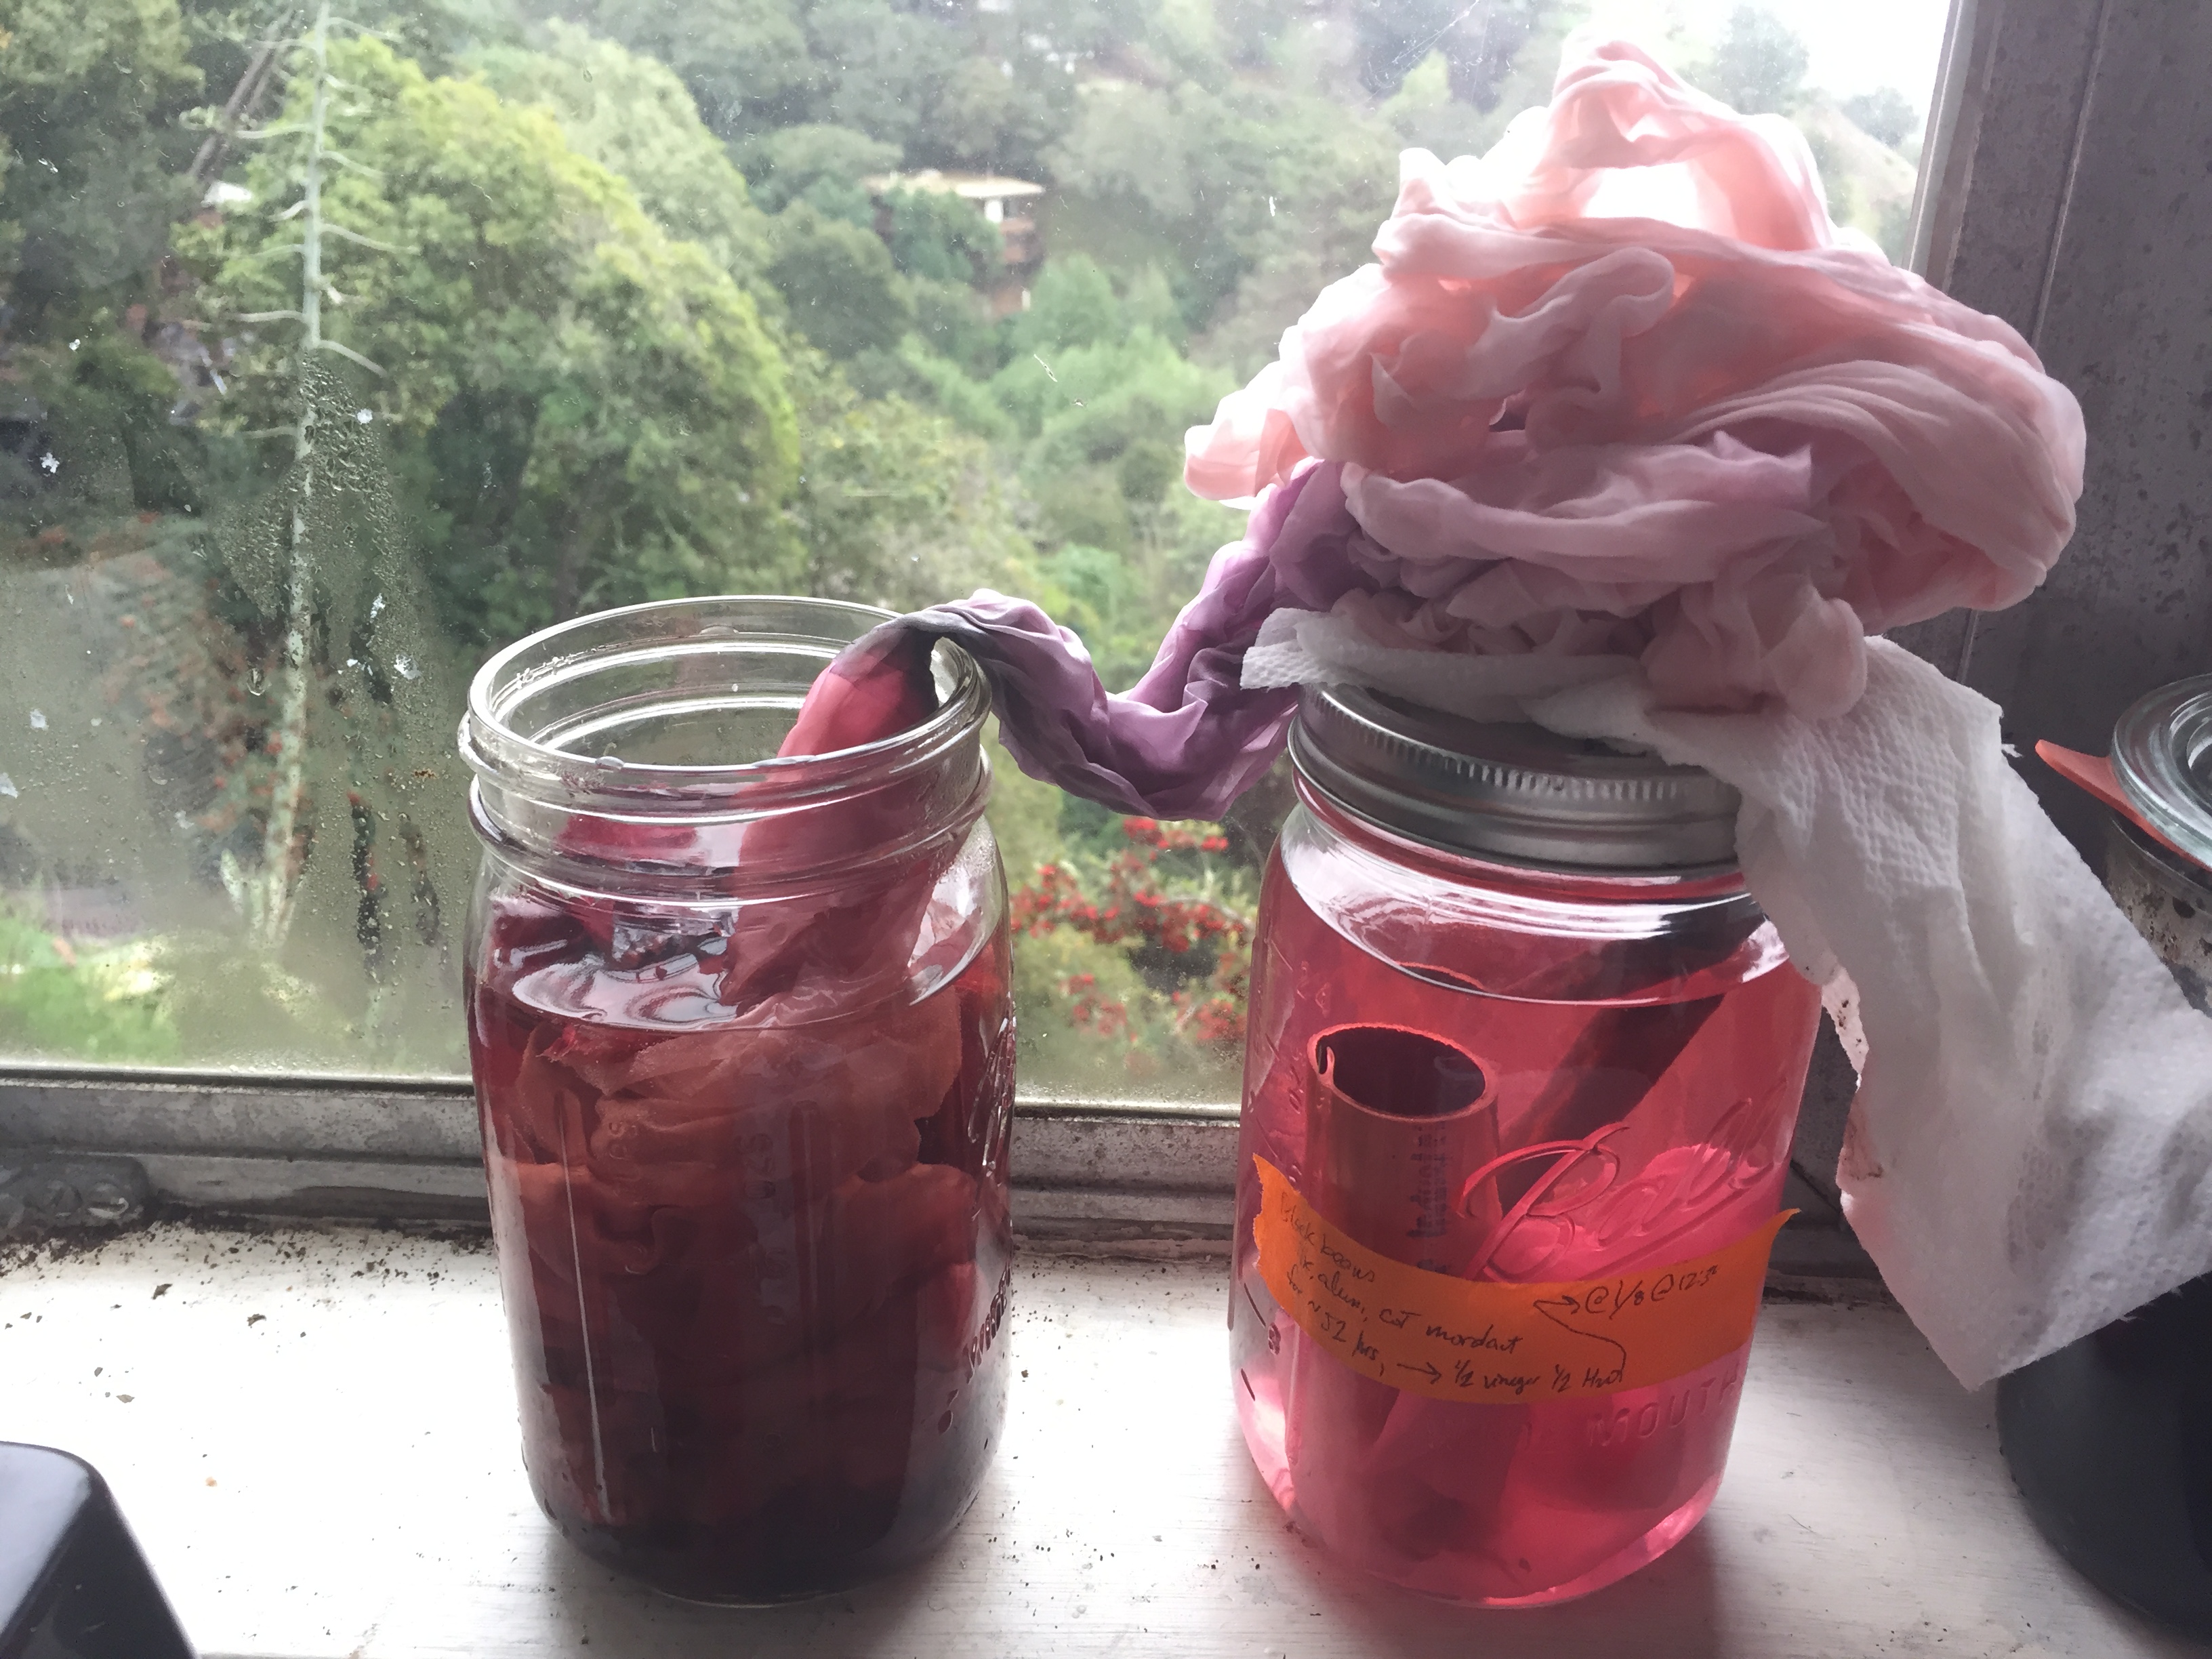
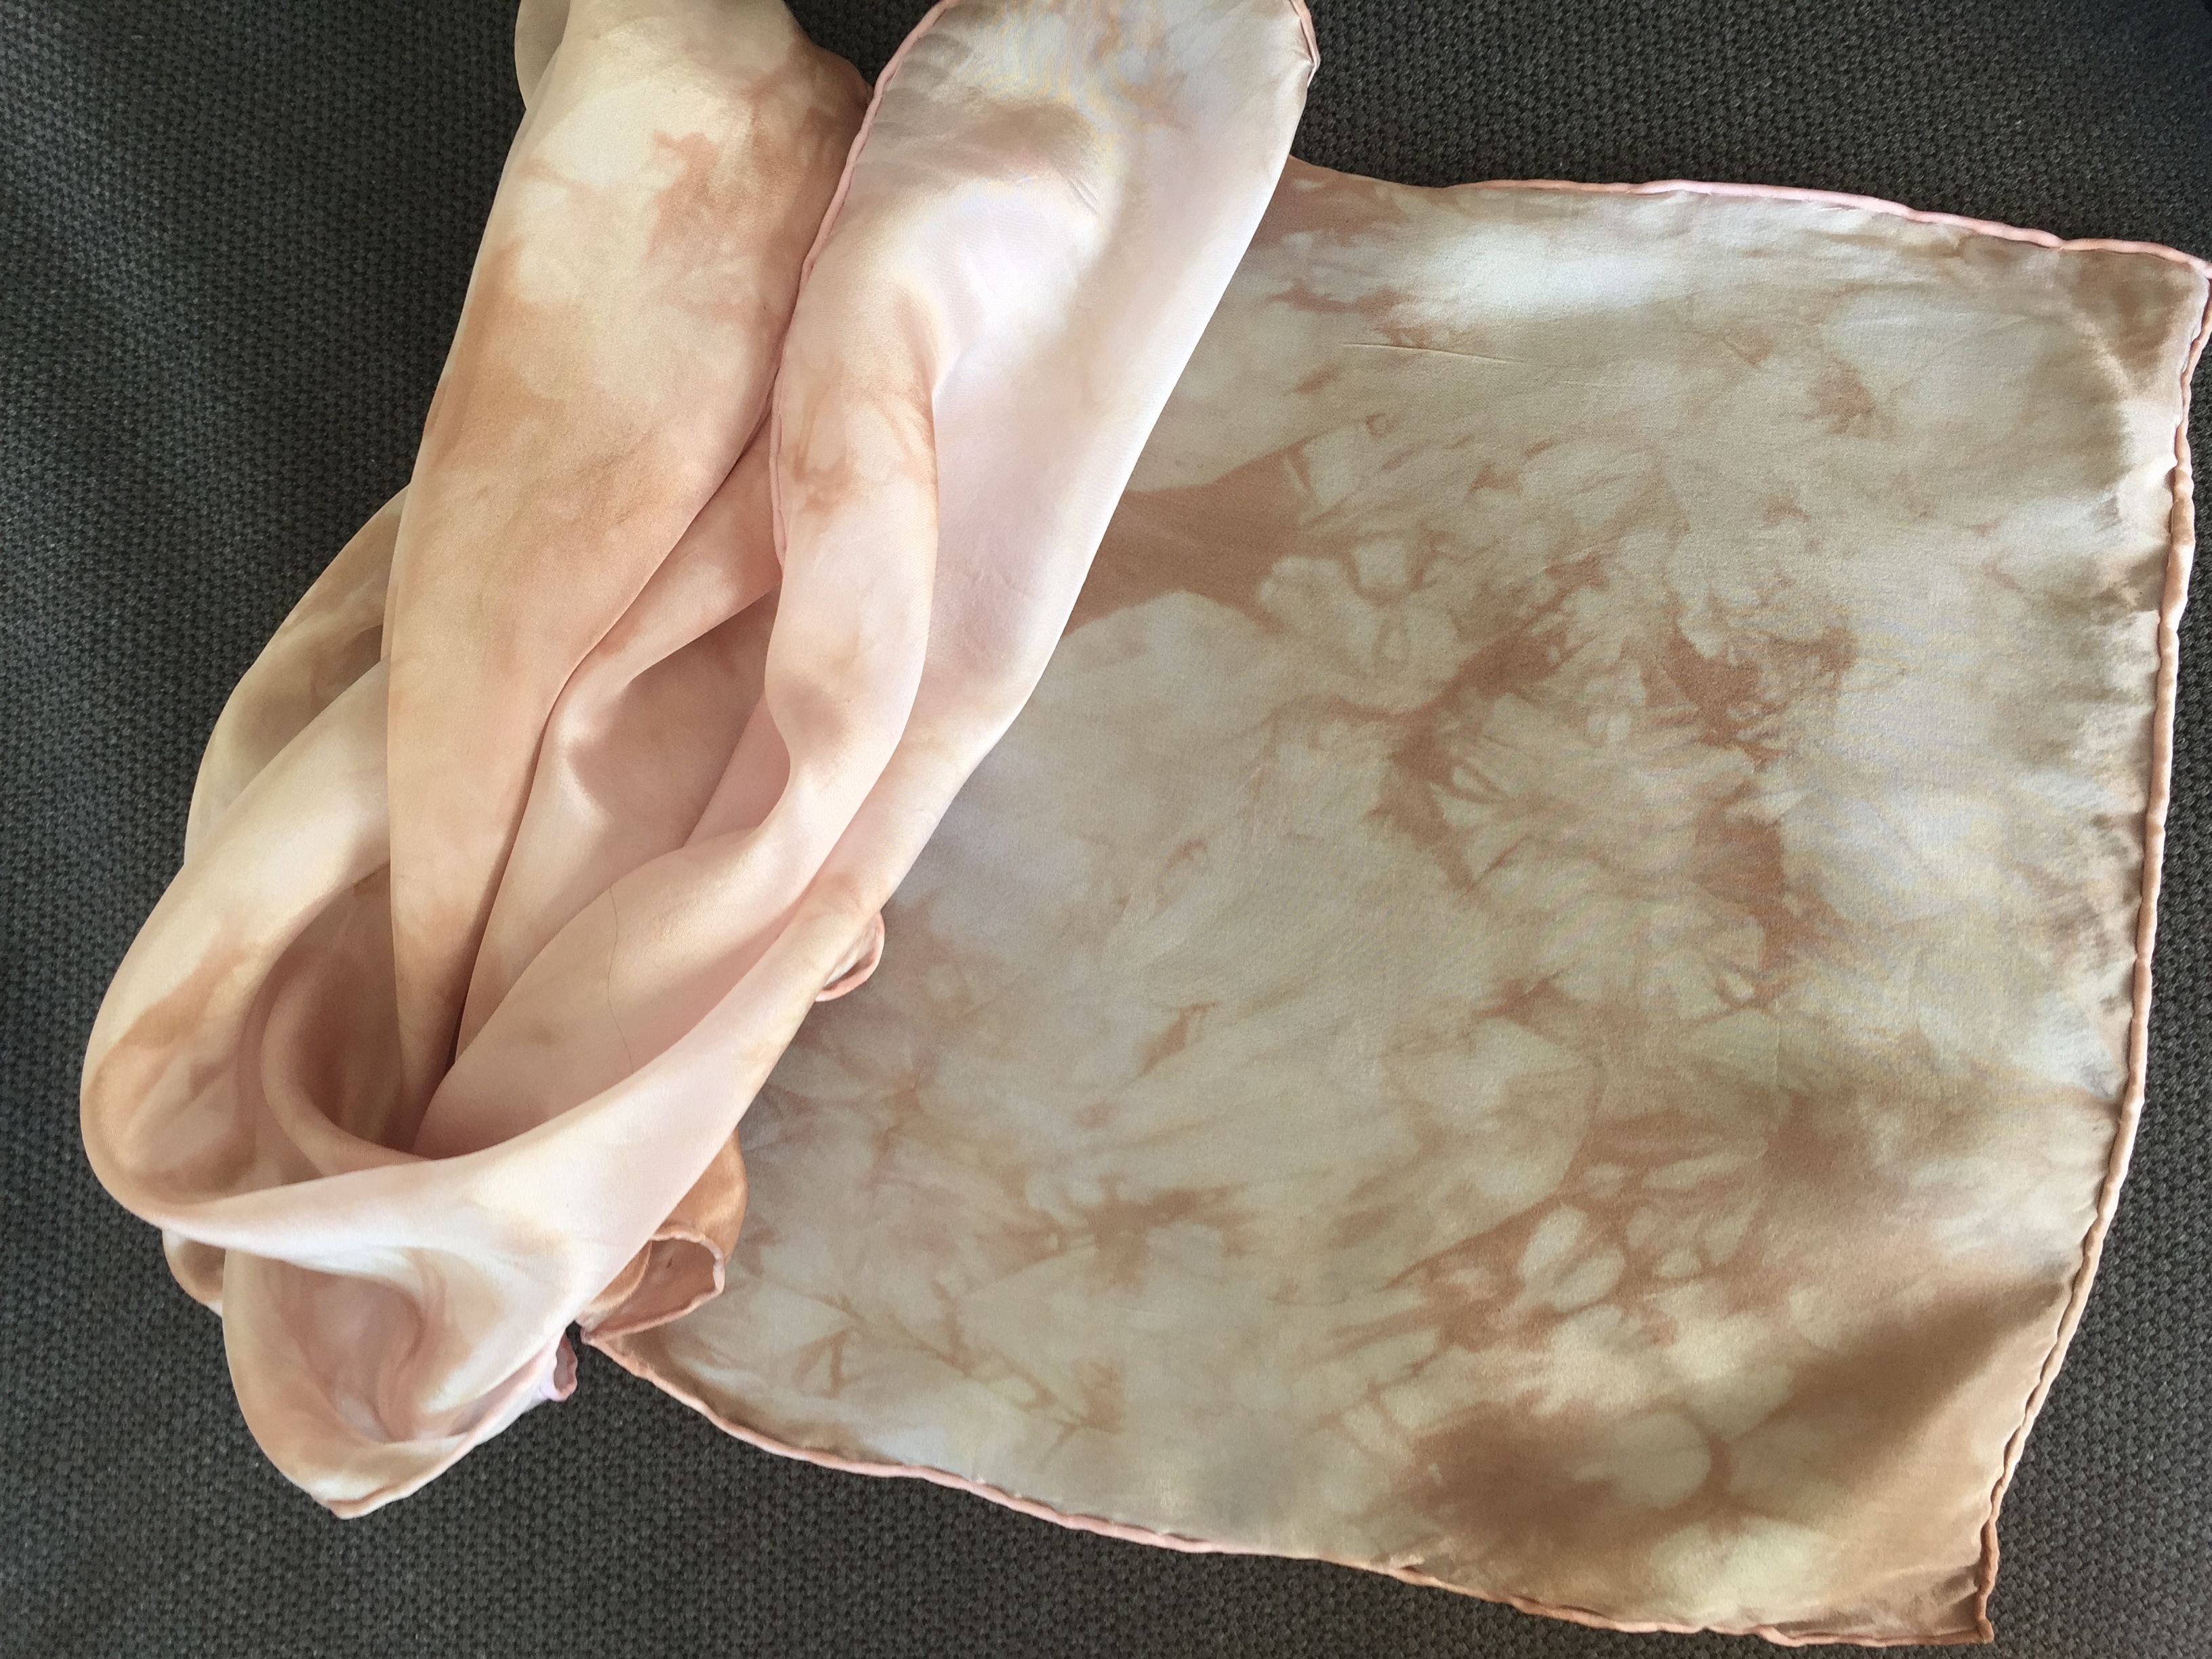
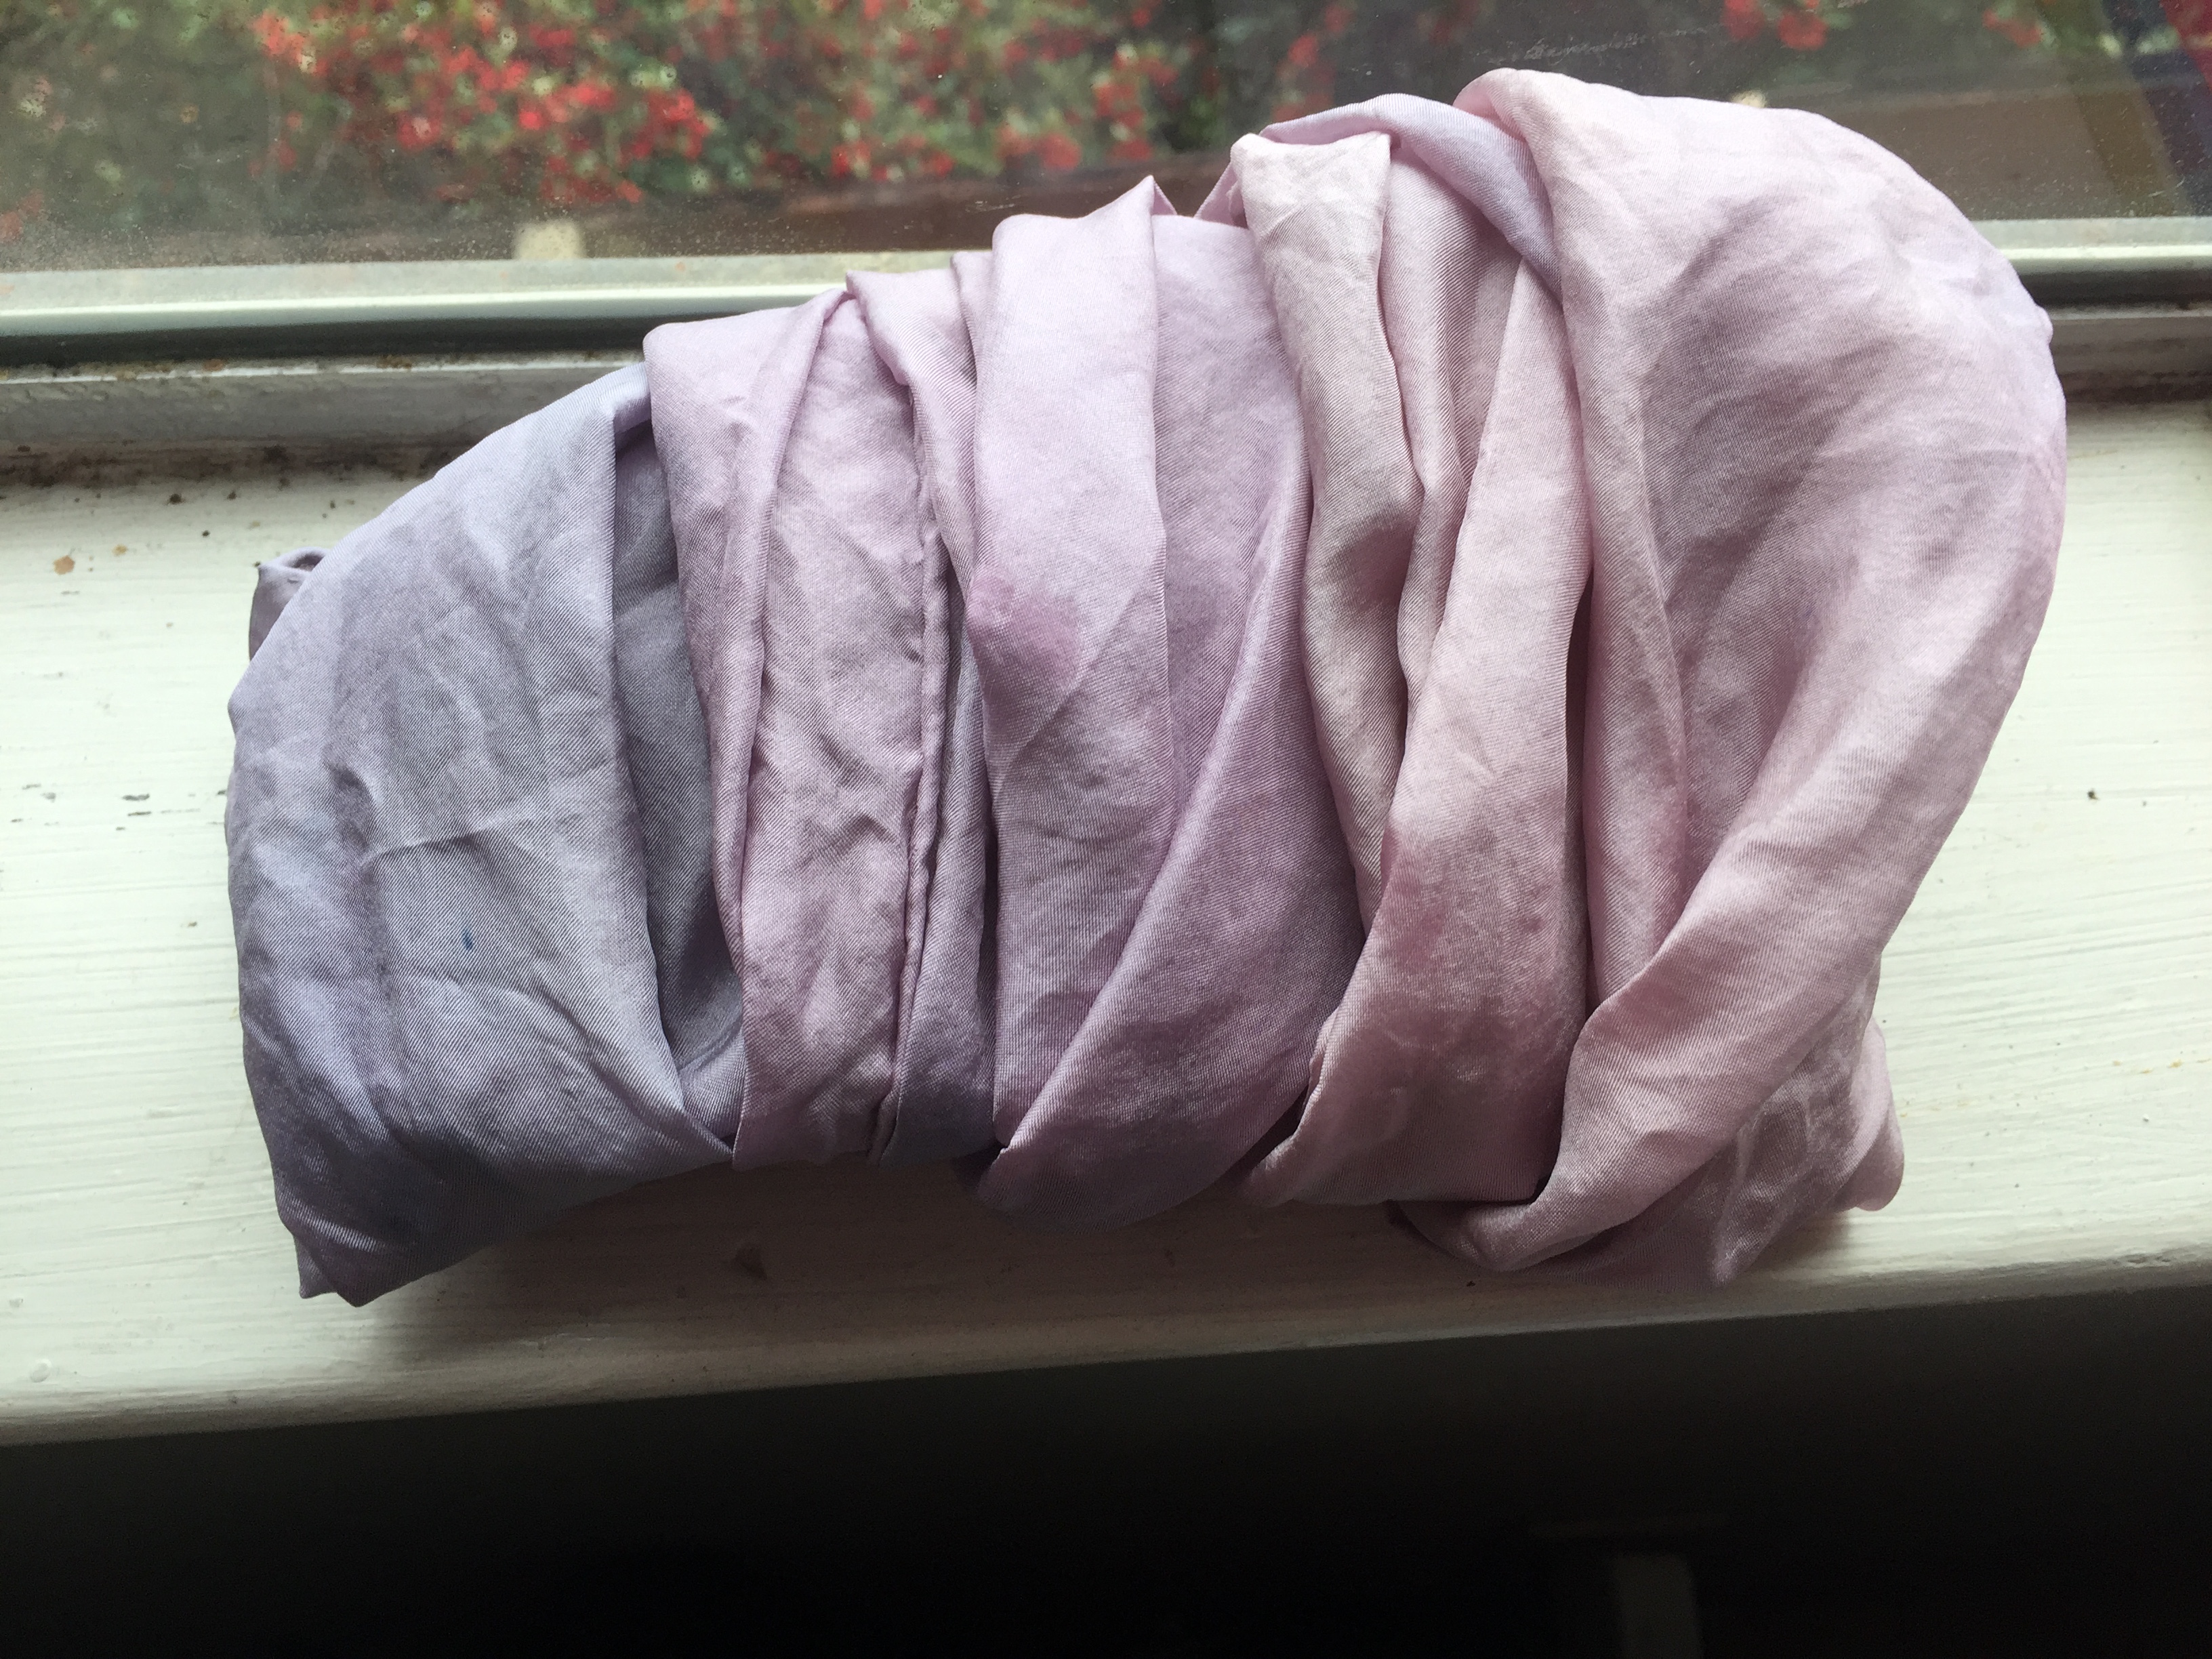
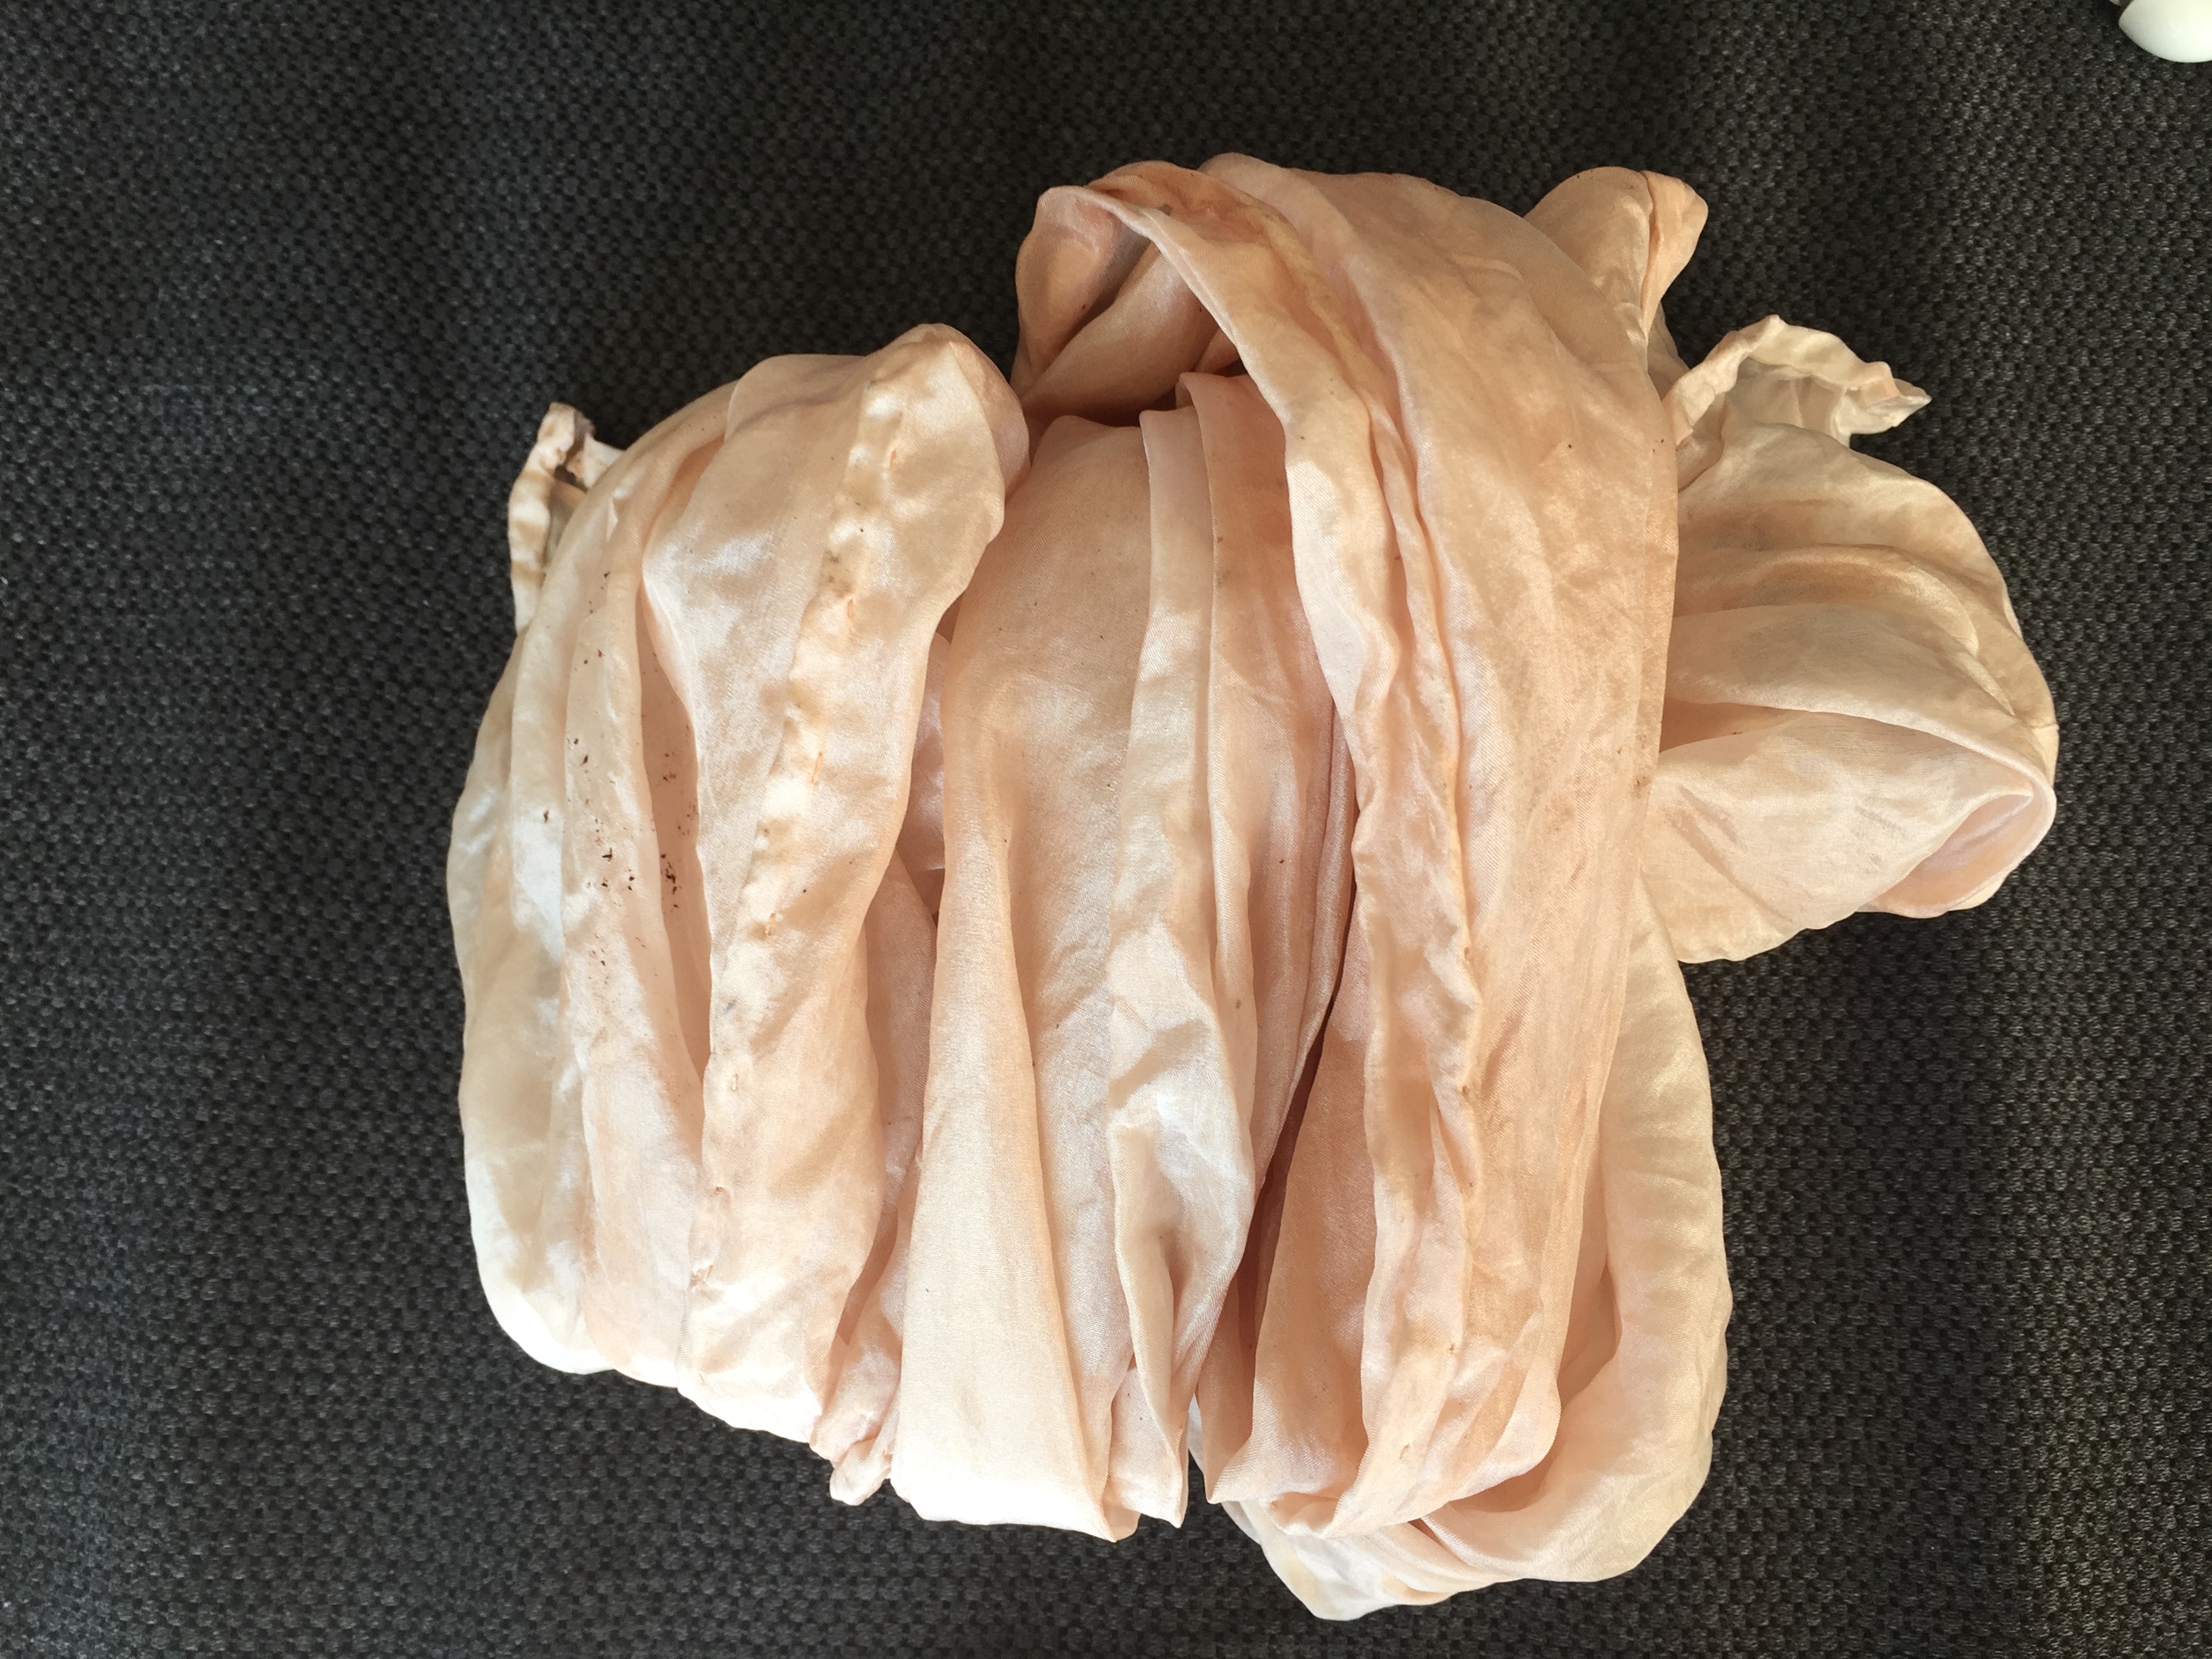
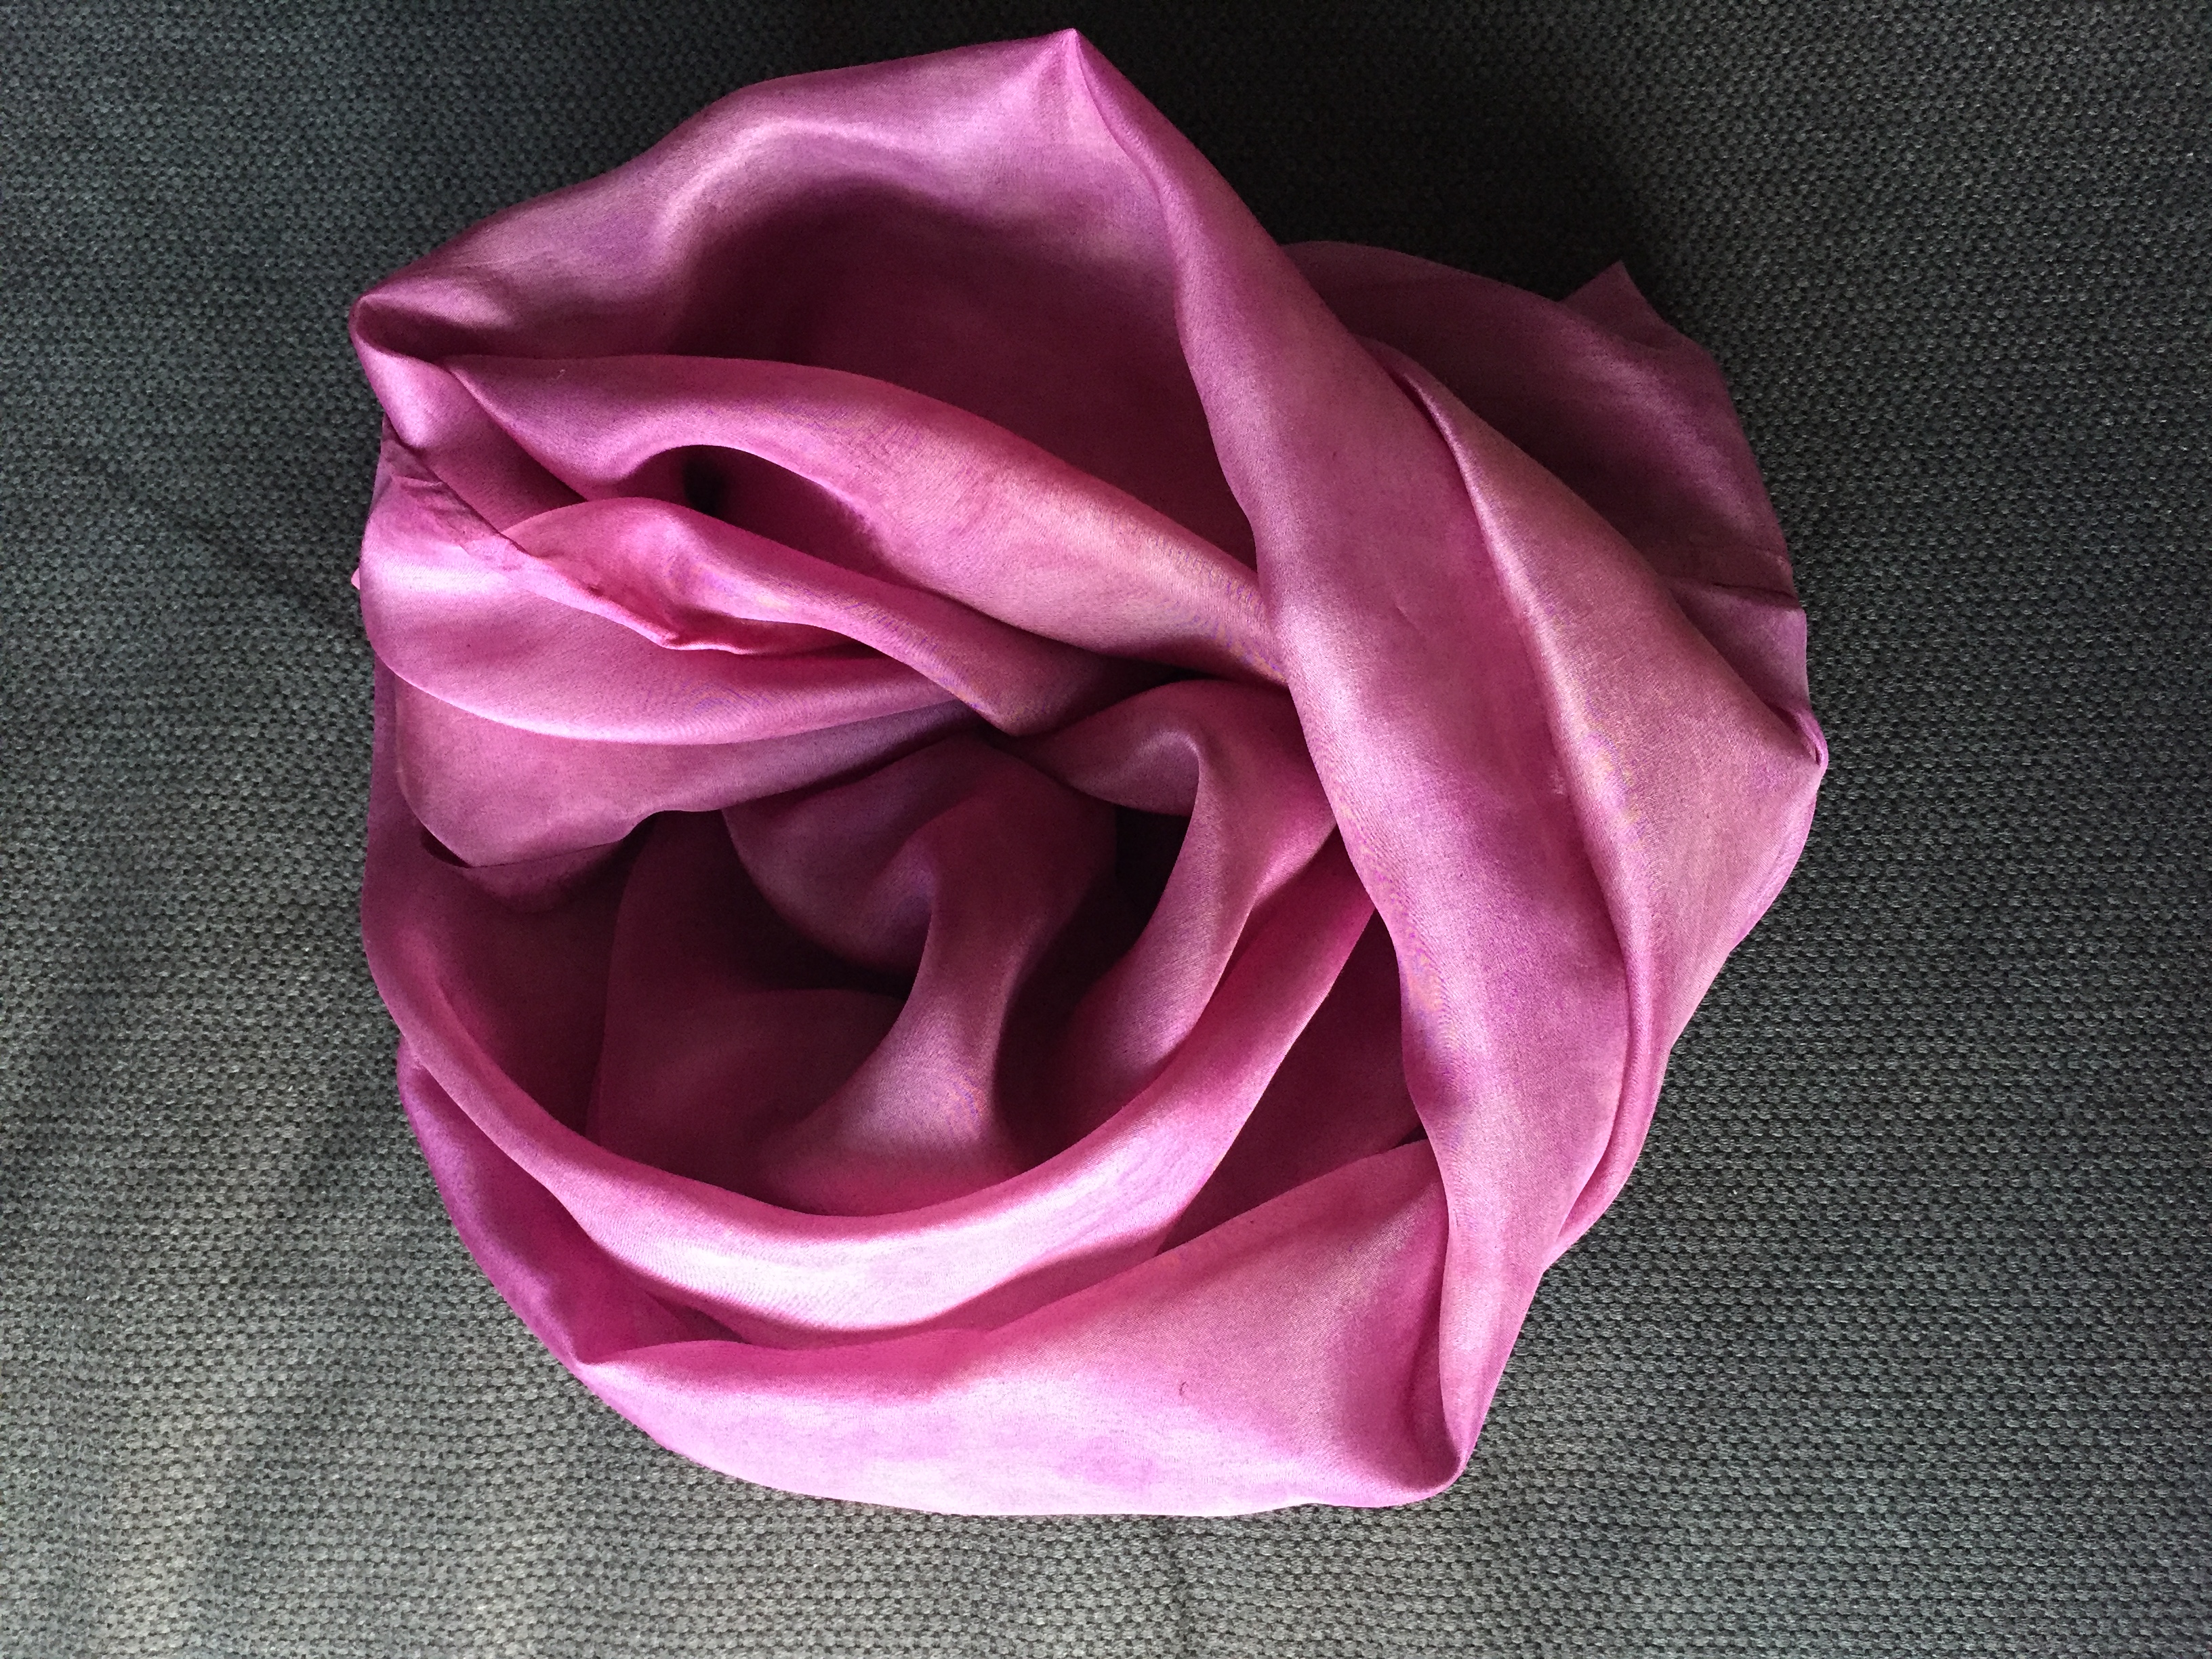
After washing, the silk from above looked like this. I loooove the variety of colors, from pale pink to deeper reddish pink to grey, to light purple to lilac:
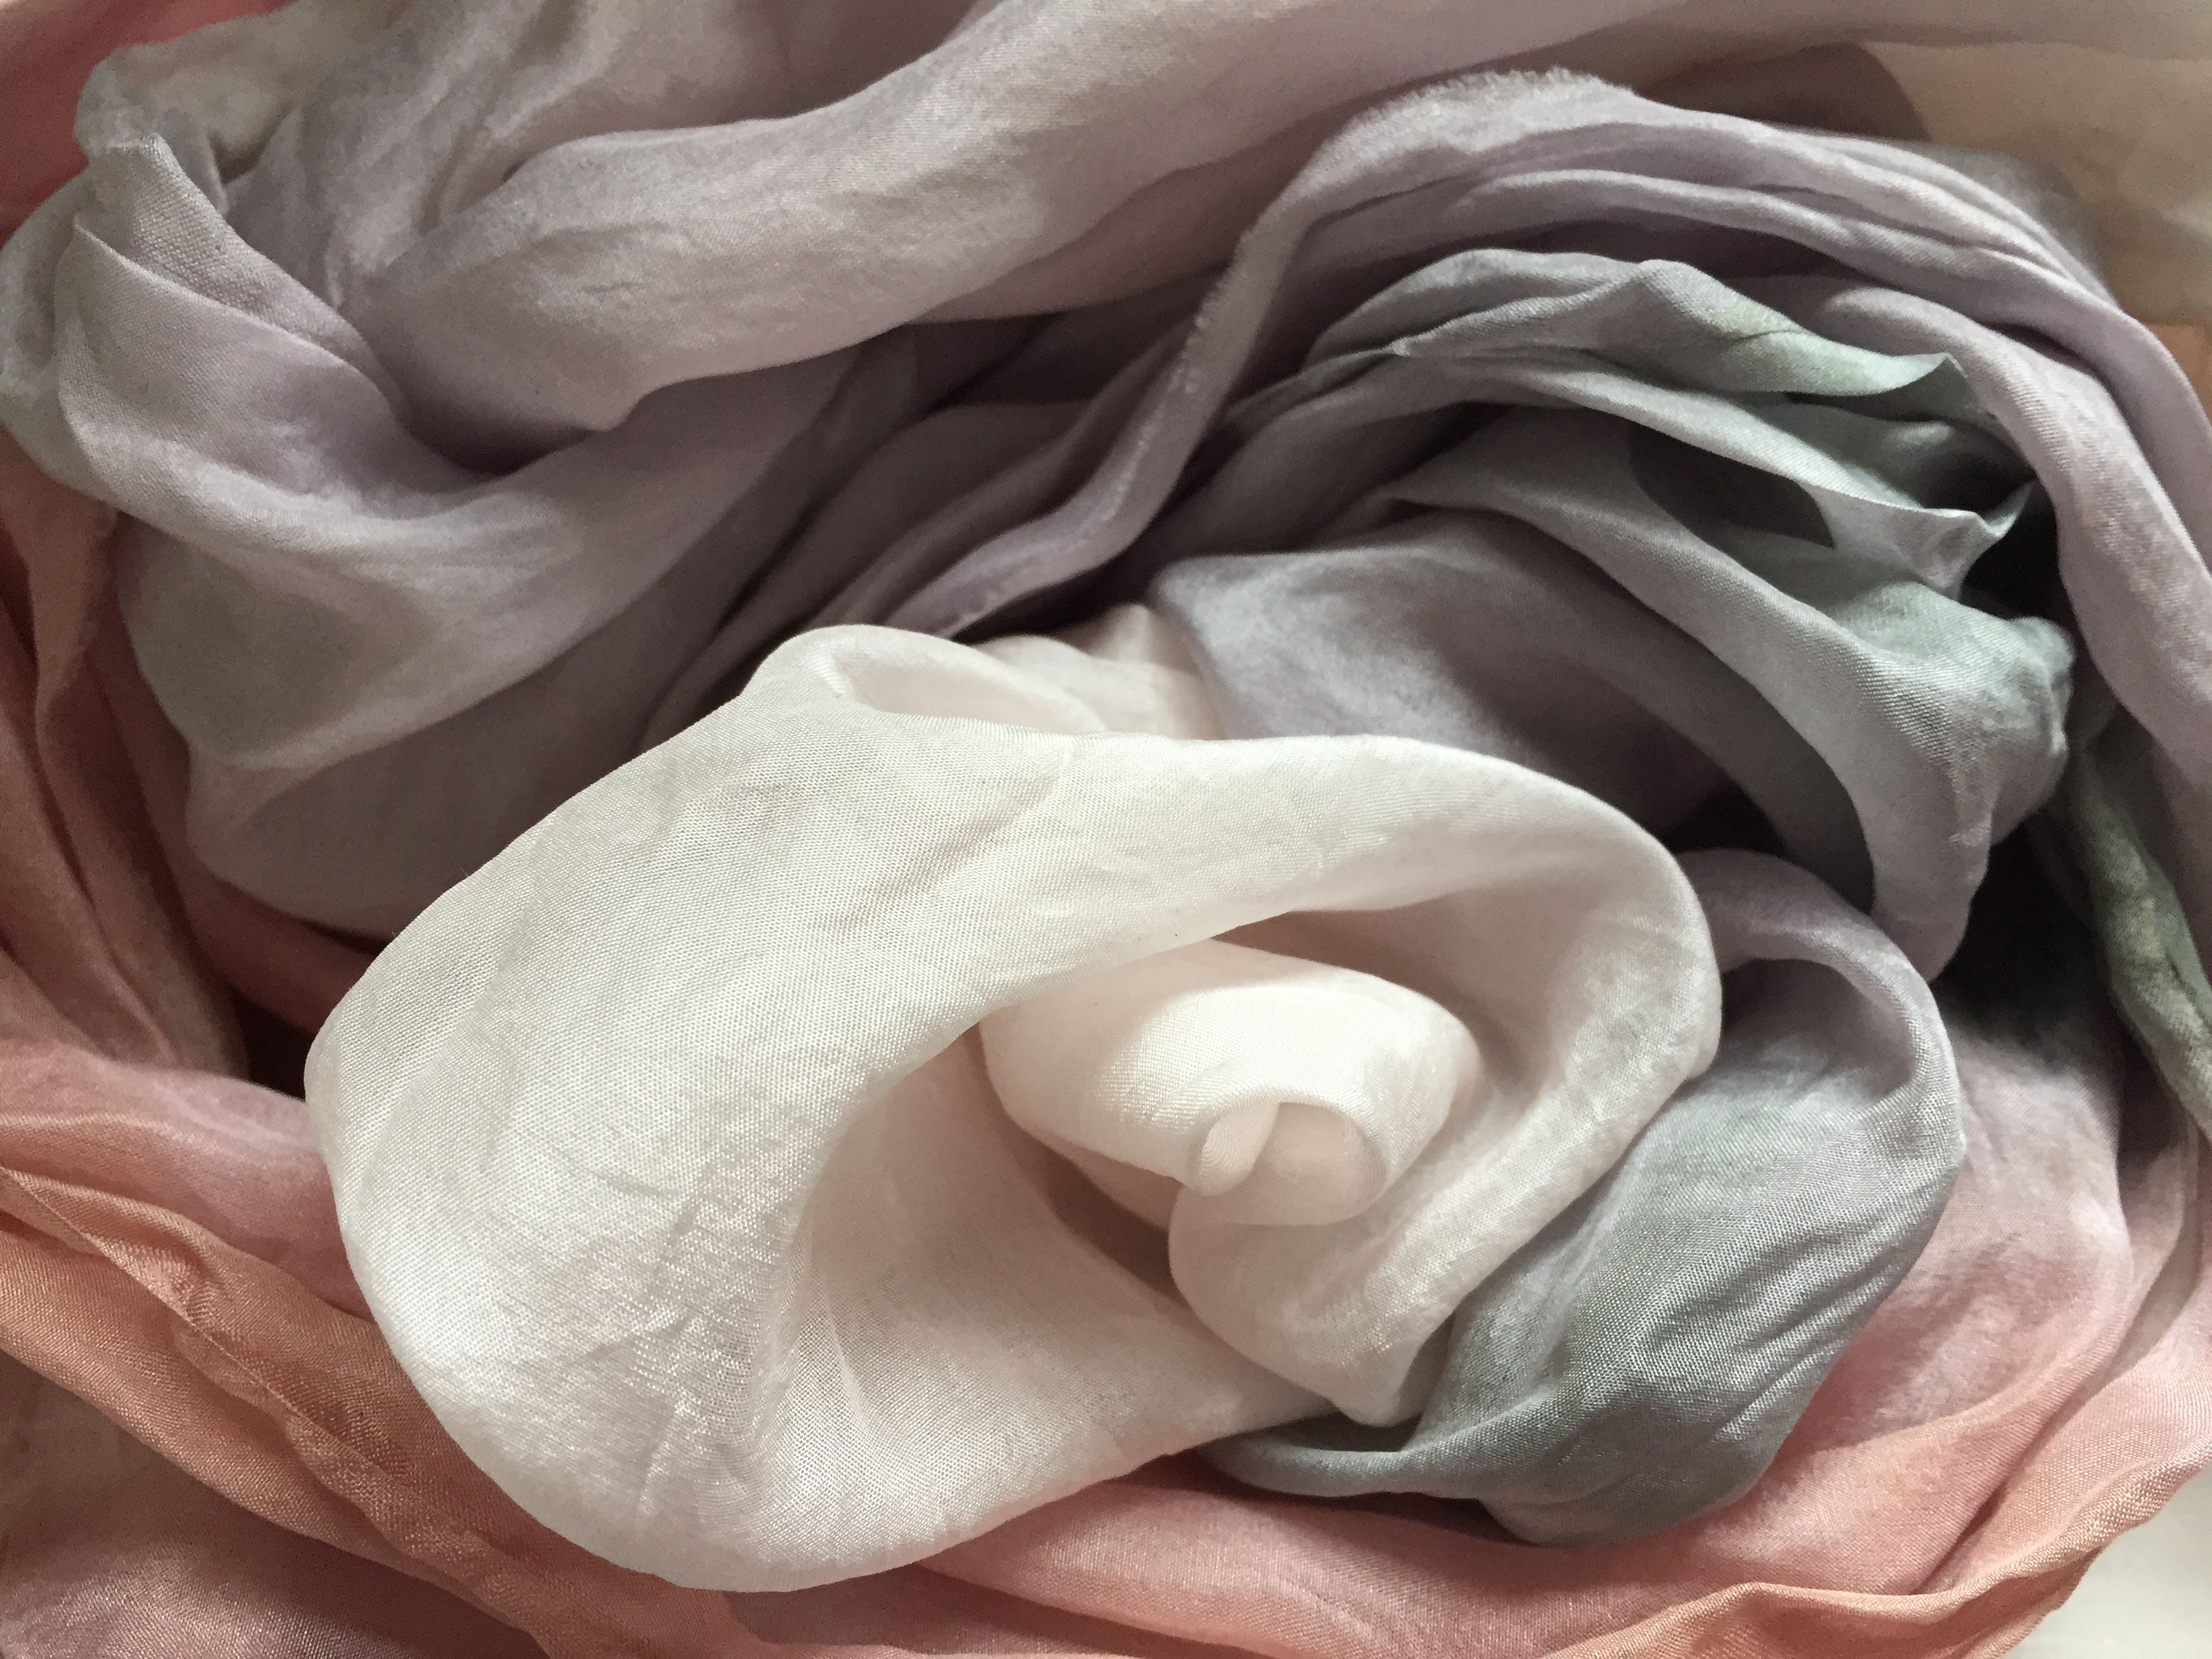 Finished scarf.
More Results
Black beans
- Mordant: Alum and cream of tartar.
- Dye: Black beans for ~24 hours.
- Post-dye: Dipped one end in vinegar.
The black beans actually turned BRIGHT pink in the dye bath, then quickly faded to a really nice purple by the end of the 24 hours. After taking the scarf out, I dipped one half into a jar filled with vinegar and a copper pipe. The color immediately shifted to pink and stayed that way. I don’t think the copper had anything to do with the color change, just the vinegar.
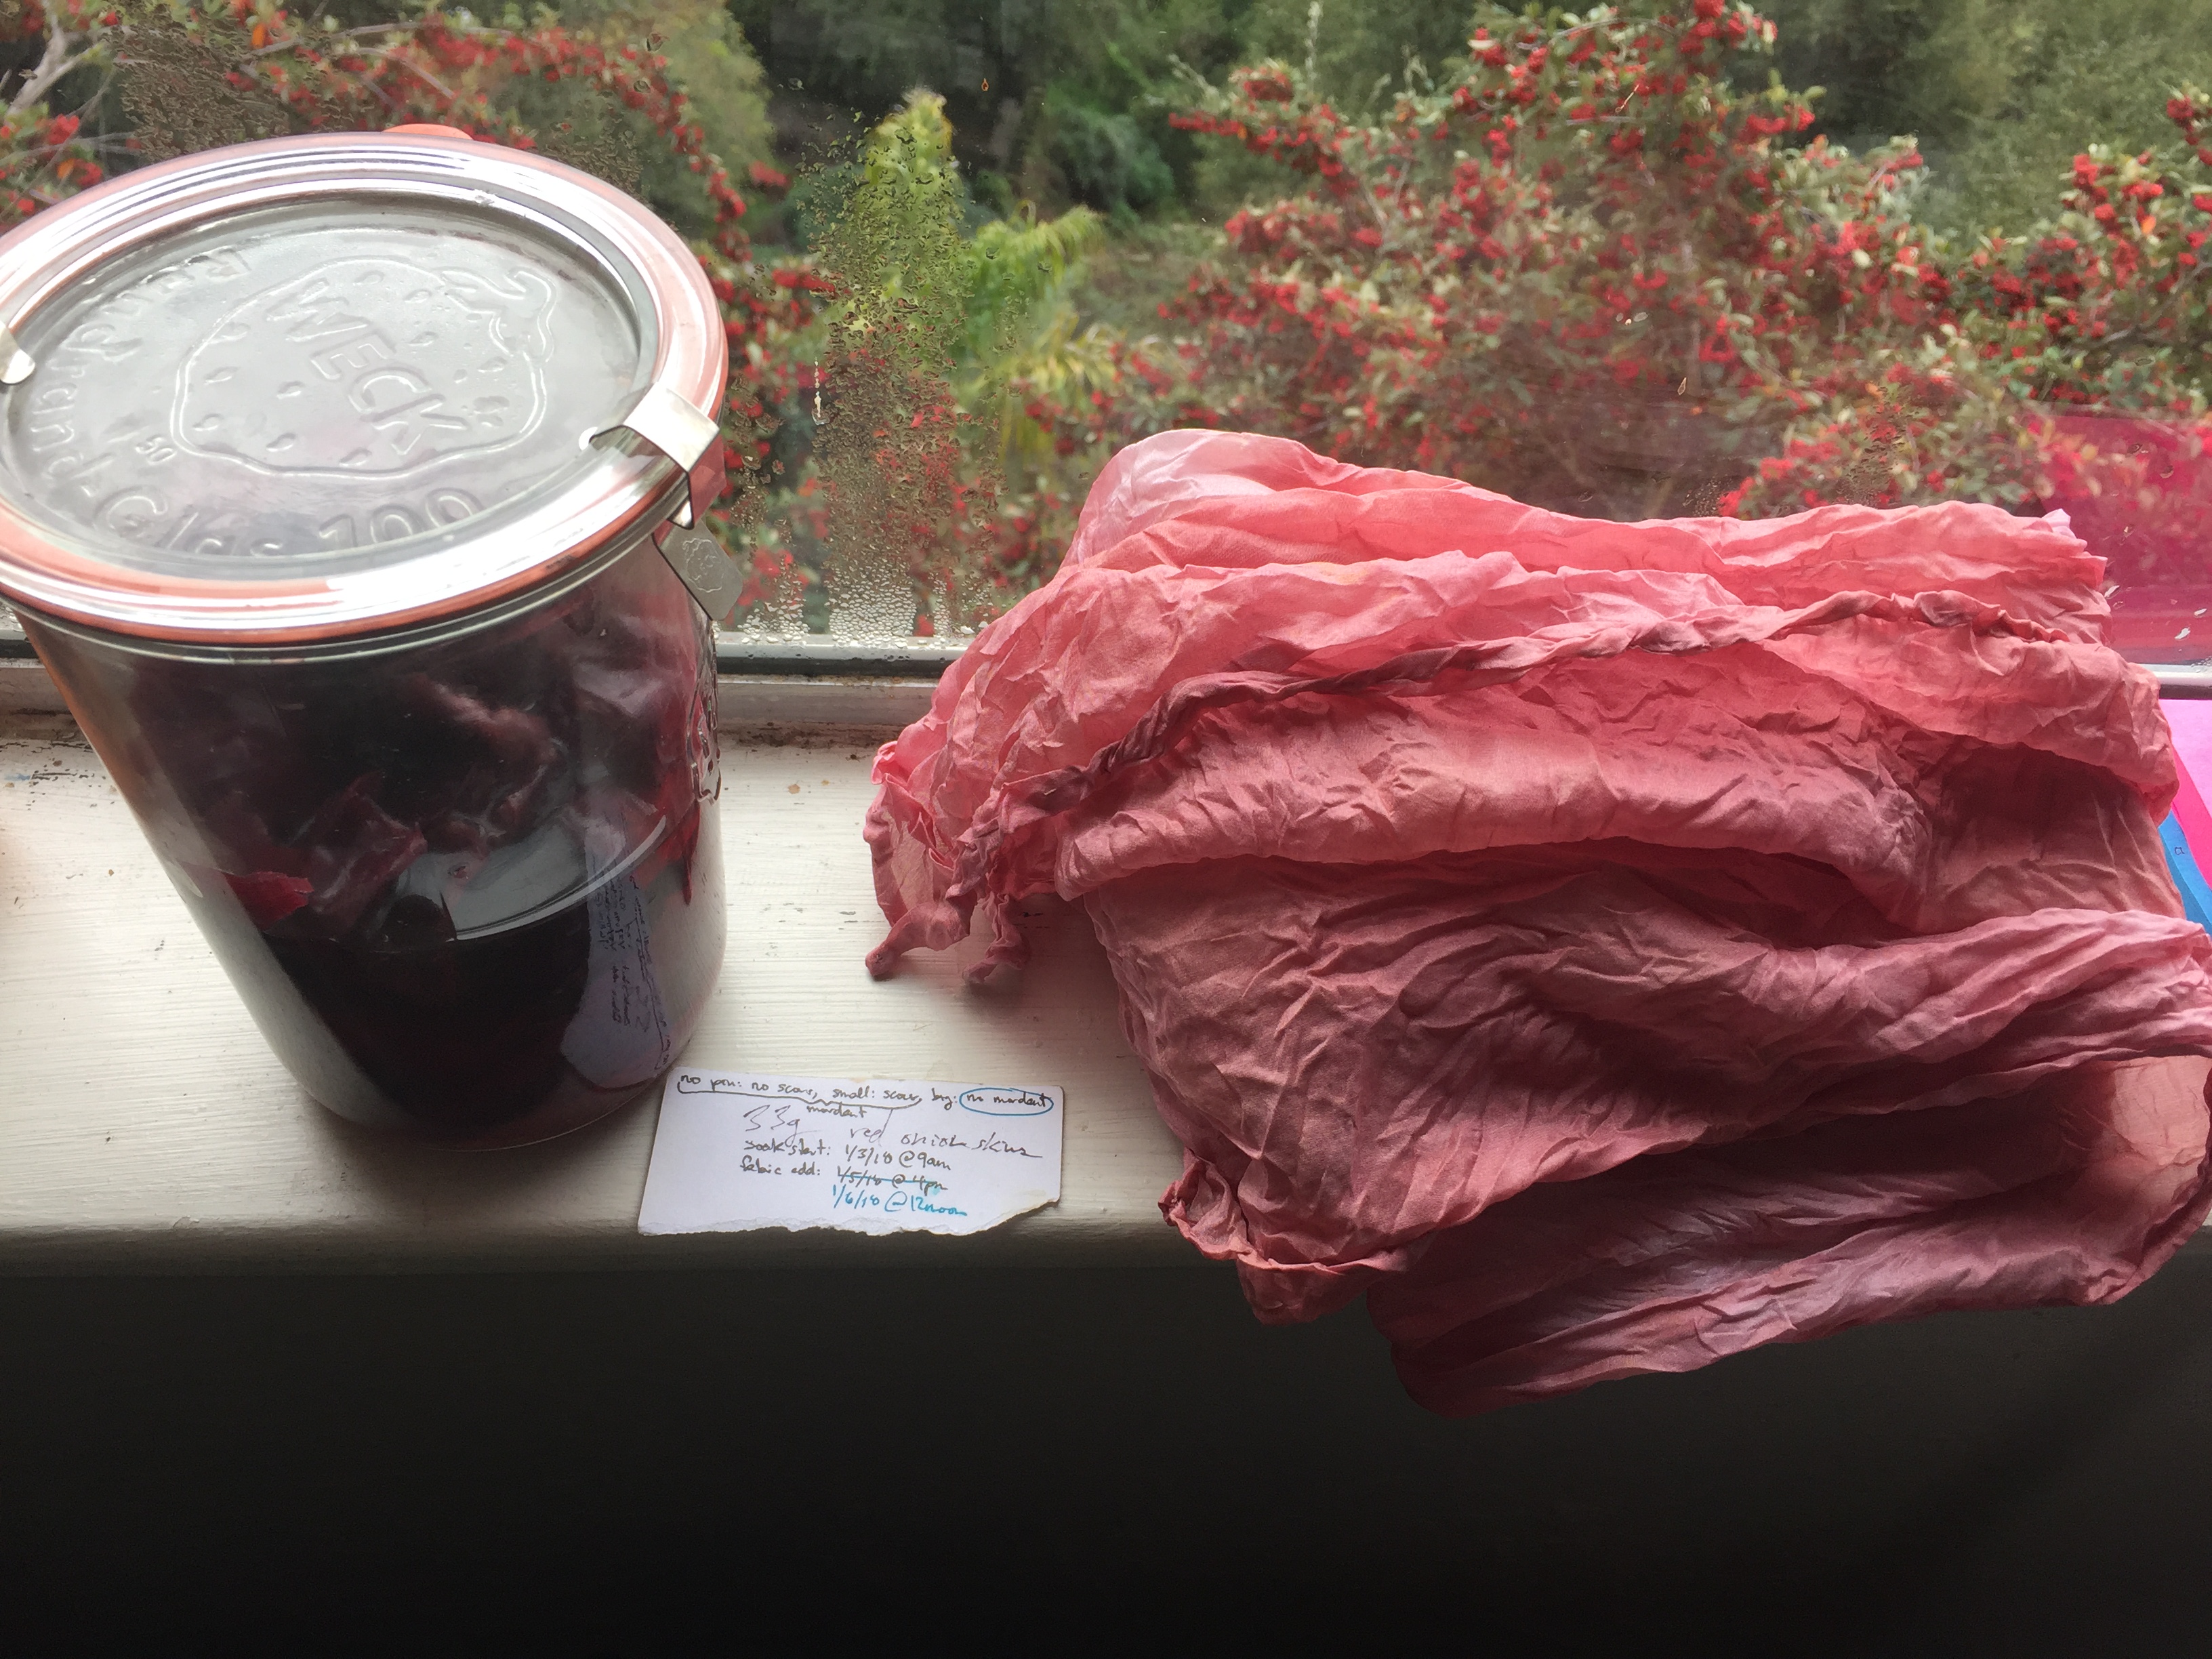
Red and yellow onion skins
- Mordant: Alum and cream of tartar.
- Dye: Red onion skins or yellow onion skins.
I tried some random tight twists on the one in the yellow onion dye bath. Since I didn’t follow a shibori pattern it didn’t turn out very well, but I was amazed at how little color got into the twisted parts.
Avocado pits
- Mordant: Alum and cream of tartar.
- Dye: 3 Avocado pits for ~7 days.
I soaked the avocado pits for 24 hours before using them. I heated them up in the pot for ~45 minutes a few times. I also added DIY soda ash since some people had success with that. I suspect I heated them up too much, or just didn’t have enough avocado pits for a deeper color.
Cochineal
- Mordant: Alum ONLY
- Dye: cochineal
I first did this one in a wicking bath on the avocado-skin dye from above, but it barely changed at all. So then I stuffed the scarf into a small mason jar filled with fresh cochineal and left it for a week to get this incredibly bright color.
Black beans
- Mordant: Alum and cream of tartar.
- Dye: Black beans for ~3 days (fermented)
- Post-dye mordant: copper and vinegar bath.
I left the beans in the sun for about 3 days, at which point it had started to ferment and smelled bad. The color was also terrible, so I threw the whole thing into another mason jar with copper pipes and vinegar. Left it there for another 3 days, and got this amazing rich turquoise color.
Hopefully this will help someone else with their own experiments!